Why Jayme Matkozich Leaves Her Garden “Messy”

National Pollinator Week was June 22 to 28, the annual celebration started by the Pollinator Partnership to spotlight bees, butterflies, birds, and the other small creatures that keep our food and gardens going. It’s the perfect week to talk about something our own native plant specialist, Jayme Matkozich, has been preaching to J.A. Rutter customers for years: the best thing you can do for pollinators isn’t what you plant. It’s what you leave alone.

A Western PA Garden That Works All Year

Most of us were raised to think a good gardener cleans up in the fall. Cut everything back, bag the leaves, rake it bare, and call it tidy. Jayme does the opposite, and she has the birds and bugs to prove it works.

“I leave the seed heads up all fall, winter, and into early spring so I can enjoy the birds all year long,” Jayme said. “It’s basically bird seed on a stick. Why would I buy a bag of seed at the store when my coneflowers and cup plant are already growing it for free?”

That’s not just a nice sentiment. It’s backed by research. Penn State Extension’s Master Gardener program notes that birds will feast on the mature, nutritious seeds of flower heads like sunflowers, asters, black-eyed Susans, coneflowers, and goldenrod if gardeners leave them standing through winter instead of cutting them down in the fall cleanup rush.

It’s not only birds benefiting from the mess. Many native bees spend the winter tucked inside the same plants. Penn State Extension explains that several types of bees, including small carpenter bees, mason bees, and leaf cutter bees, carve out nests inside dry, hollow plant stems and spend the winter there, and the mason bees in particular are among the first pollinators active in fruit orchards each spring. Cut the stems down to the ground in October, and you’ve thrown out next year’s pollinators with the yard waste.

The Xerces Society, one of the leading invertebrate conservation groups in the country, puts it simply: providing winter cover is one of the single most valuable things a gardener can do for pollinators and other invertebrates.

July in the Garden: A Feast for the Senses

Pollinator Week falls right in the thick of peak garden season, and Jayme says that’s no accident.

“In July, the garden isn’t just visually buzzing with activity, it’s audibly buzzing,” she said. “You can hear the humming as you walk through it. It’s a feast for the senses, not just a feast for the eyes.”

That hum is the sound of a healthy native plant garden doing its job. Pennsylvania is home to roughly 450 species of native bees, most of them solitary, quiet, and easy to overlook because they don’t swarm or behave aggressively like honeybees can. When a garden is planted right, with native perennials blooming in succession through the season, you don’t just see pollinators. You hear them.

“Every time I go out there, I’m amazed at the variety,” Jayme added. “It’s not just bees. It’s wasps, cool spiders, flies, beetles and moths. The number of new insect friends keeps growing every year as the garden matures. That’s the real sign it’s working.”

Why This Matters Beyond One Backyard
Pollinators aren’t a side interest for gardeners. Three-fourths of the world’s flowering plants and about a third of human food crops depend on pollination to produce. And the populations doing that work are under real pressure. Congressional resolutions marking Pollinator Week this year point to the difficulties many pollinator species face, including the iconic Western Monarch butterfly, as a reason the week exists at all.

A home garden won’t reverse that trend on its own. But multiplied across a neighborhood, a township, a county, native plantings add up to real habitat. That’s the case Jayme has been making to J.A. Rutter customers all along: native plants aren’t just lower maintenance and better suited to our western PA soil and climate. They’re infrastructure for the insects and birds that the rest of the ecosystem depends on.

Three Things You Can Do For Pollinator Week

Jayme’s advice for anyone looking to get started, or looking to do a little less this fall:

  1. Skip the fall cleanup, at least partway. Leave seed heads on coneflowers, black-eyed Susans, asters, and goldenrod through winter. The birds will use them, and so will overwintering insects.
  2. Leave some stems standing. If you need to cut back, leave 8 to 24 inches of stalk above the ground on hollow-stemmed natives like bee balm, Joe Pye weed, and milkweed. That’s exactly the kind of housing cavity-nesting bees need.
  3. Plant in succession. A garden with something blooming from spring through fall keeps pollinators fed the whole season, not just in June.

Want help figuring out which native plants will give you that audible, buzzing garden Jayme talks about? Stop by J.A. Rutter and ask for her. She’ll walk the aisles with you and point you toward what actually works in this region’s soil and climate, not just what looks good on a tag.

Sources: Penn State Extension Master Gardener Program (Lackawanna County); Penn State Extension “Fall Garden Care for Pollinators”; U.S. Senate Pollinator Week resolution, 2026; Pollinator Partnership, Pollinator Week 2026.

A Native Garden Is the Best Thing You Can Do for Your Pennsylvania Yard

Why a Native Garden Is the Best Thing You Can Do for Your Pennsylvania Yard

If you have ever fought with Pennsylvania’s heavy clay soil, you already know the frustration. You amend a bed, plant something beautiful from the garden center, and watch it struggle through the season anyway. The good news is that the problem usually is not your effort. It is the plant. Native plants evolved alongside our region’s clay rich soil, our rainfall patterns, and our pollinators, which means they are built to thrive here instead of merely survive.

At J.A. Rutter Co., we have been working with Western Pennsylvania soil since 1972, and we have put this idea into practice ourselves. Our team built a native plant pollinator garden on our own property, in a very challenging area where fill and heavy clay soil were dumped. We couldn’t dig to remove the fill material and replace it with good soil due to underground utilities. So, instead of fighting the conditions, we chose plants suited to them. Here is why we think more homeowners and landscapers should do the same.

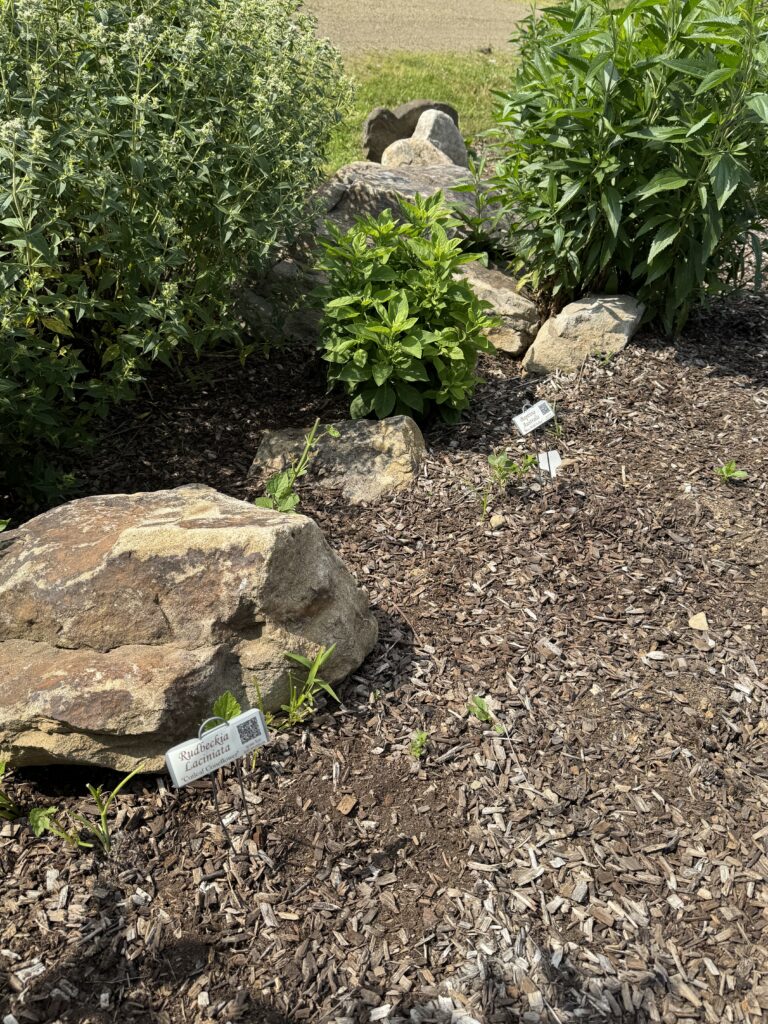
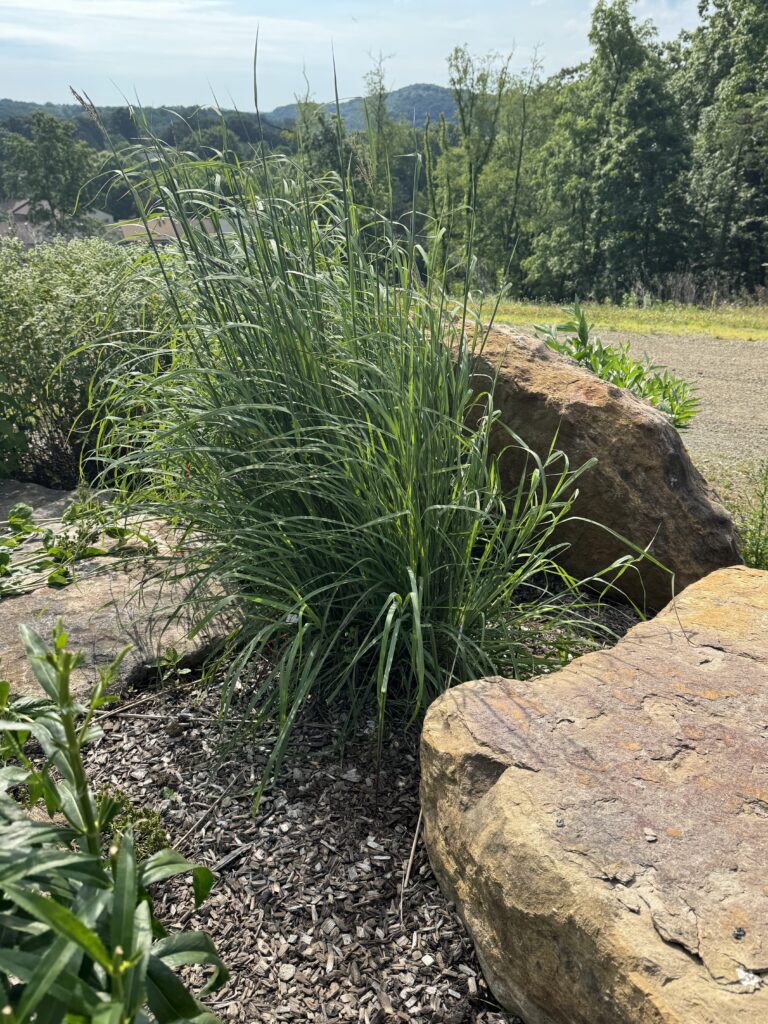
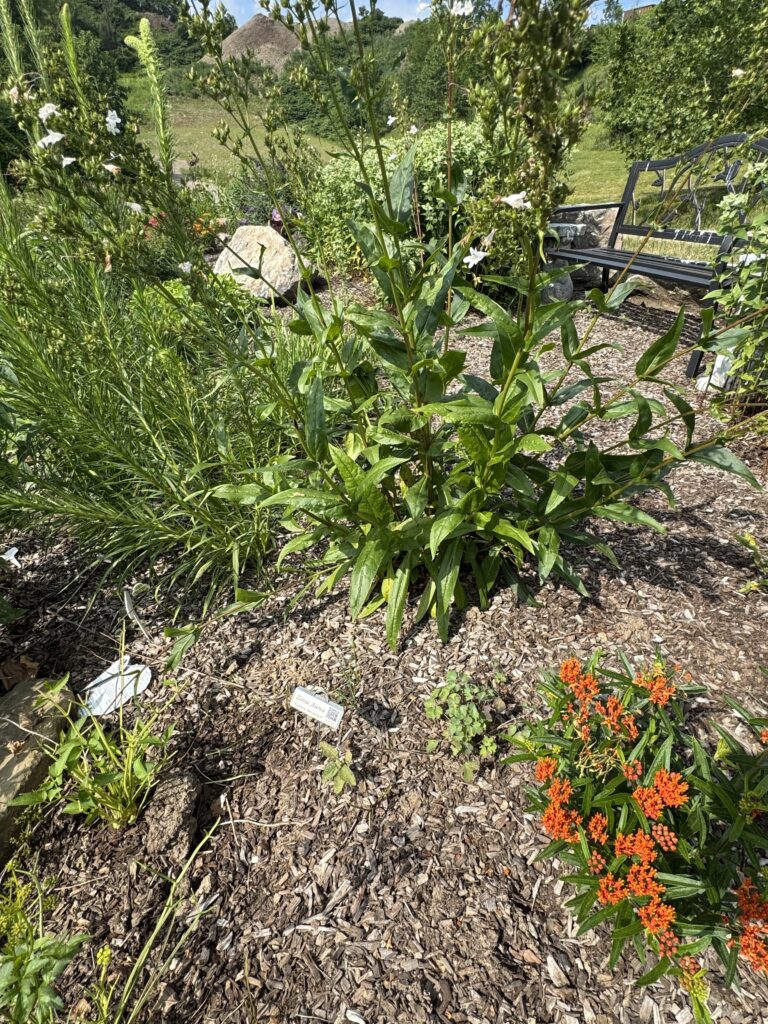
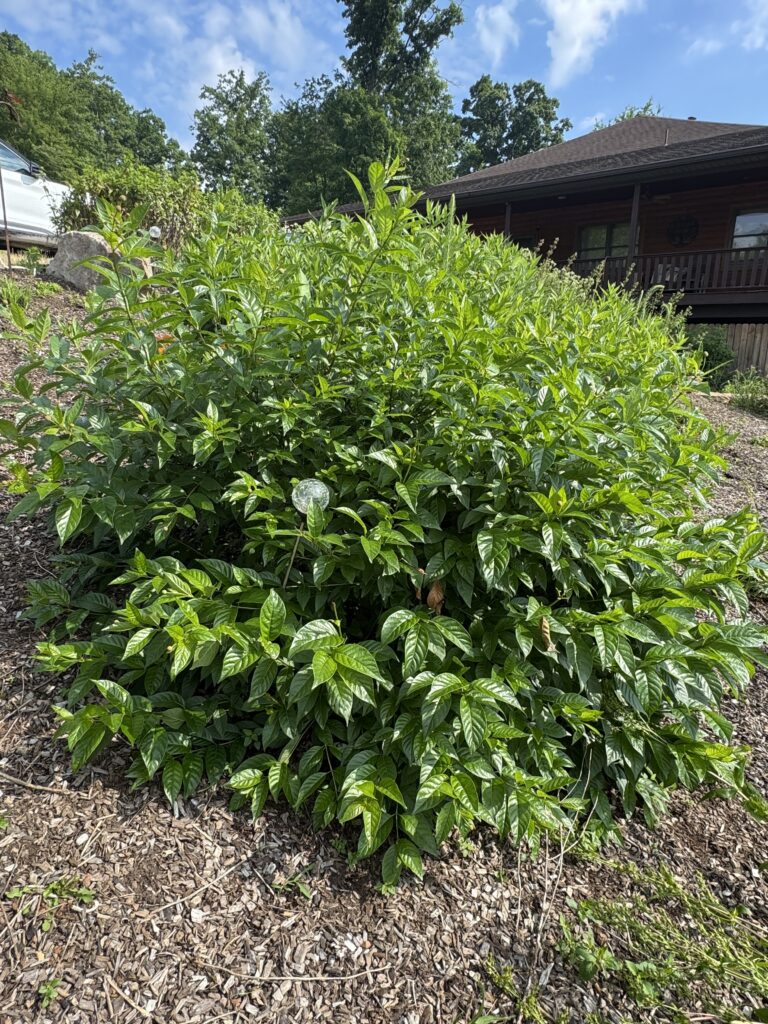
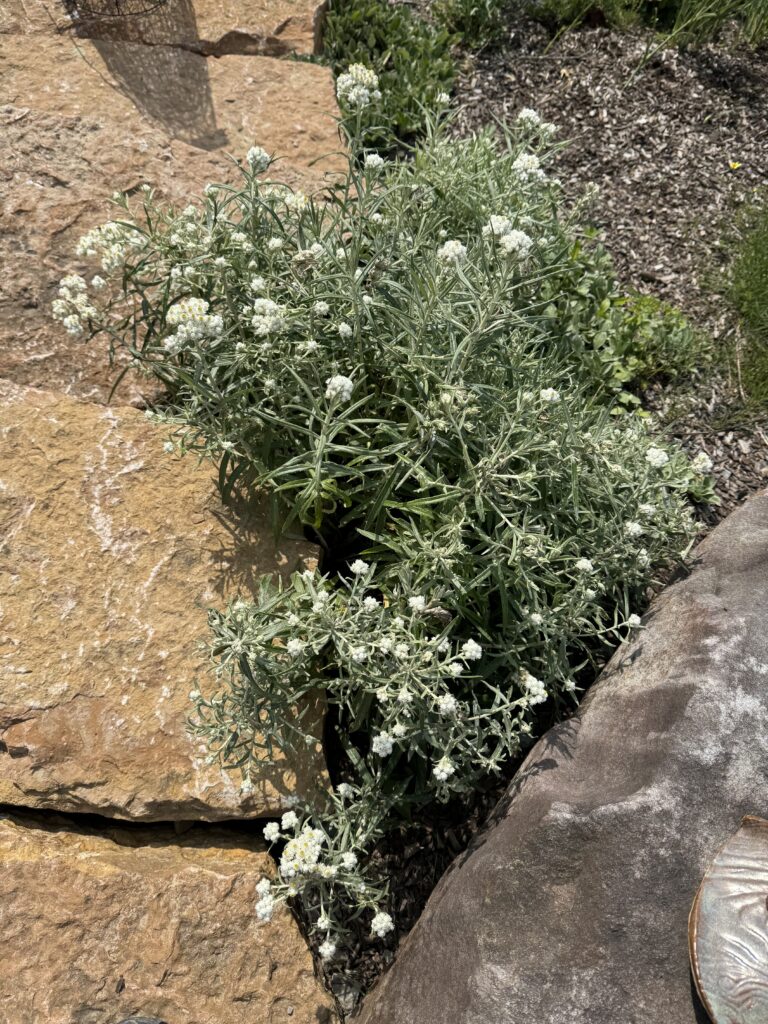
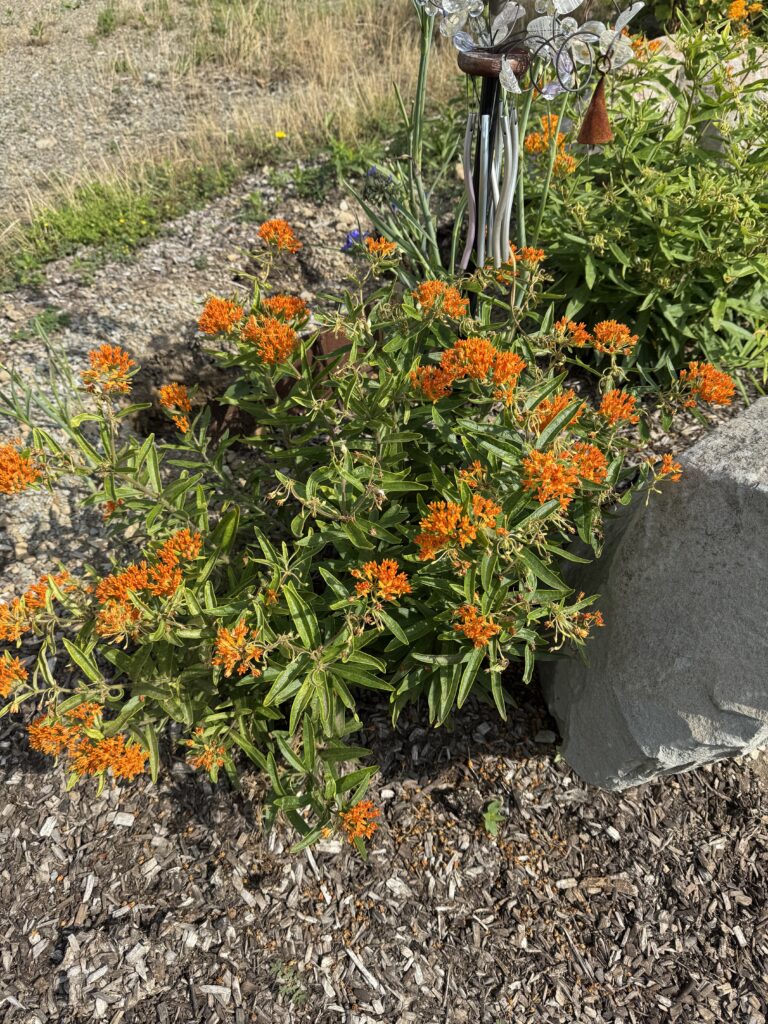
Butterfly Weed (Asclepias tuberosa), Compass Plant (Silphium laciniatum), Columbine (Aquilegia canadensis) and Pearly Everlasting (Anaphalis margaritacea) which is a host plant for the American Lady butterfly.

Native plants are made for Pennsylvania clay

Clay soil gets a bad reputation, but it is not actually a flaw in your yard. It holds nutrients well and retains moisture, conditions that suit a number of native trees and perennials well, even if not every native plant prefers them. Penn State Extension notes that common witch-hazel enjoys moist, rich, well-drained soil but can also tolerate clay soil and some drought once established, and that northern hackberry can tolerate a wide range of soil types and can withstand drought, soil compaction, heat, salt, wind, ice, air pollution, and short-term flooding, making it a strong choice for tougher residential sites.

Not every native plant is suited to clay, but many of the species commonly recommended for Pennsylvania landscapes, including the trees and perennials covered later in this post, evolved in regions where dense or compacted soils are common. That history gives them an advantage over many ornamental varieties bred for looser, well-drained conditions. The practical result is less time spent battling drainage issues and more time enjoying a garden that works with the soil you already have.

This is also why “right plant, right place” is the first rule we follow when we design a bed. Choosing species that are adapted to the site’s existing light, moisture, and soil conditions takes most of the guesswork out of long term plant health.

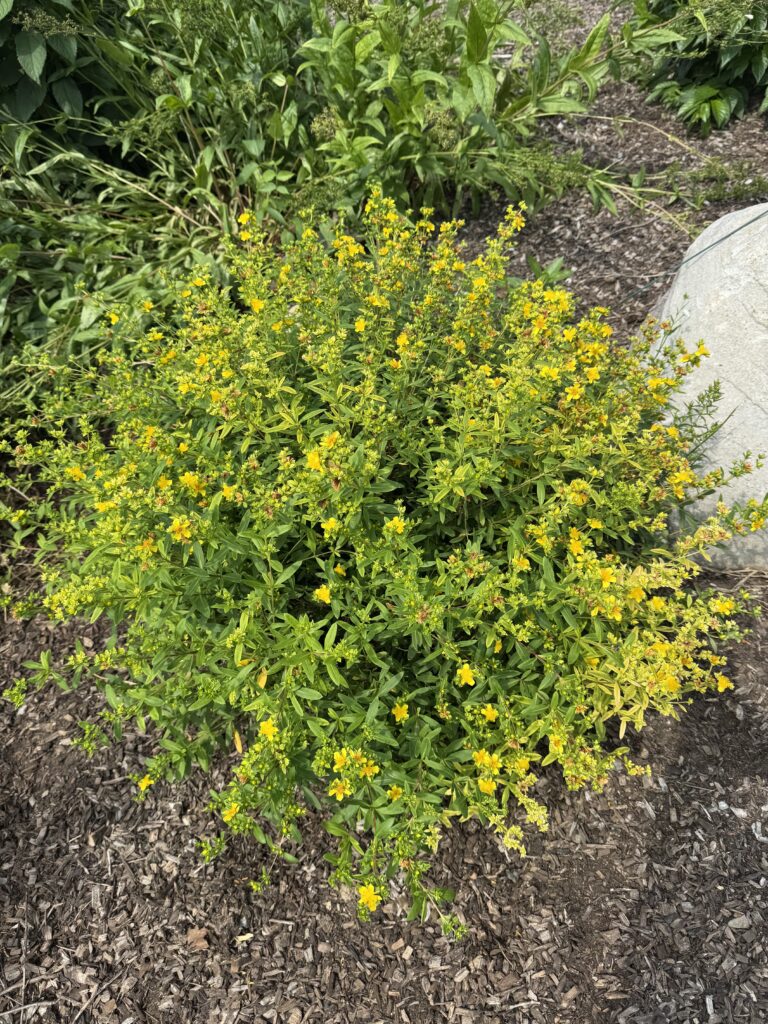
has common yarrow (Achillea millefolium) and 2 kinds of mountain mint: Blunt Mountain Mint (Pycnanthemum muticum) and Slender Mountain Mint (Pycnanthemum tenuifolium).

Less upkeep, more payoff

Once established, native plants ask less of the homeowner over time. Penn State Extension explains that native species are generally easier to care for once established, needing little or no pruning, deadheading, watering, or fertilizing, while exotic plants and large lawns require high levels of fossil fuel use, fertilizers, pesticides, and supplemental water. For homeowners, that means fewer hours spent trimming and feeding the bed once it has had a season or two to establish.

That lower long-term upkeep is exactly why getting the bed right at installation matters so much. A native garden’s low maintenance reputation depends on what goes into the ground at the start: properly prepared soil, the right compost mixed in for clay-heavy sites, and a solid layer of mulch to regulate moisture and suppress weeds while plants establish their root systems. Skipping that step is the most common reason a “low maintenance” native bed ends up needing far more attention than expected. For landscapers, that makes the installation phase, not the years of upkeep that follow, the highest value part of a native planting project.

A garden that actually feeds your pollinators

Native plants are not just easier on you. They are essential for the insects and birds in your yard. The Xerces Society, a leading invertebrate conservation nonprofit, points out that pollinators are necessary for the reproduction of over 85% of the world’s flowering plants, including more than two-thirds of the world’s crop species, and that fruits and seeds derived from insect pollination are a major part of the diet of approximately 25% of all birds. When you plant native species, you are restoring the specific food sources that local bees, butterflies, and birds depend on, many of which cannot use ornamental, non-native plants the same way.

This is precisely what motivated our own pollinator garden project. As our team wrote when the project began, the goal was simple: with the plants we chose, we hope to see lots of bees, wasps, moths, flies, and butterflies. If we’re lucky, maybe some hummingbirds. We picked species suited to the soil we had to work with, which varied throughout the planting area, then let the plants do the work from there.

Getting started in your own yard

You do not need a perfectly designed landscape plan to begin. Mixing trees, perennials, and a flowering vine gives a bed structure year-round while maintaining high pollinator value.

A few clay-tolerant trees to consider:

  • Common witch-hazel enjoys moist, rich, well-drained soil but can also tolerate clay soil and some drought once established, and adds winter interest when little else is blooming.
  • Northern hackberry can tolerate a wide range of soil types and can withstand drought, soil compaction, heat, salt, wind, ice, air pollution, and short-term flooding, making it a dependable shade tree for tougher residential sites.
  • Eastern redbud handles dense, poorly draining ground well and offers one of the first pollen and nectar sources for bees emerging in spring.

A few clay-tolerant perennials to pair with them:

  • Black-eyed Susan prefers average, well-drained soils but can adapt to clay, alkaline or acid pH, and gravelly soils, blooming from July into October once established. Penn State Extension research has also found that planting several together in a drift attracts more pollinating insects.
  • Bee balm (wild bergamot) generally does well in clay and is known as a magnet for bees and hummingbirds, with aromatic foliage that also tends to be deer resistant.
  • Purple coneflower is a long blooming, deep rooted perennial that holds up well in clay and is one of the most reliable pollinator plants for a Pennsylvania bed.
  • Ironweed has powerful roots that can cut through clay soil, and its late summer purple blooms are a great pollinator plant for the season when many other flowers have finished, drawing in butterflies, bees, and even songbirds that feed on its seeds.
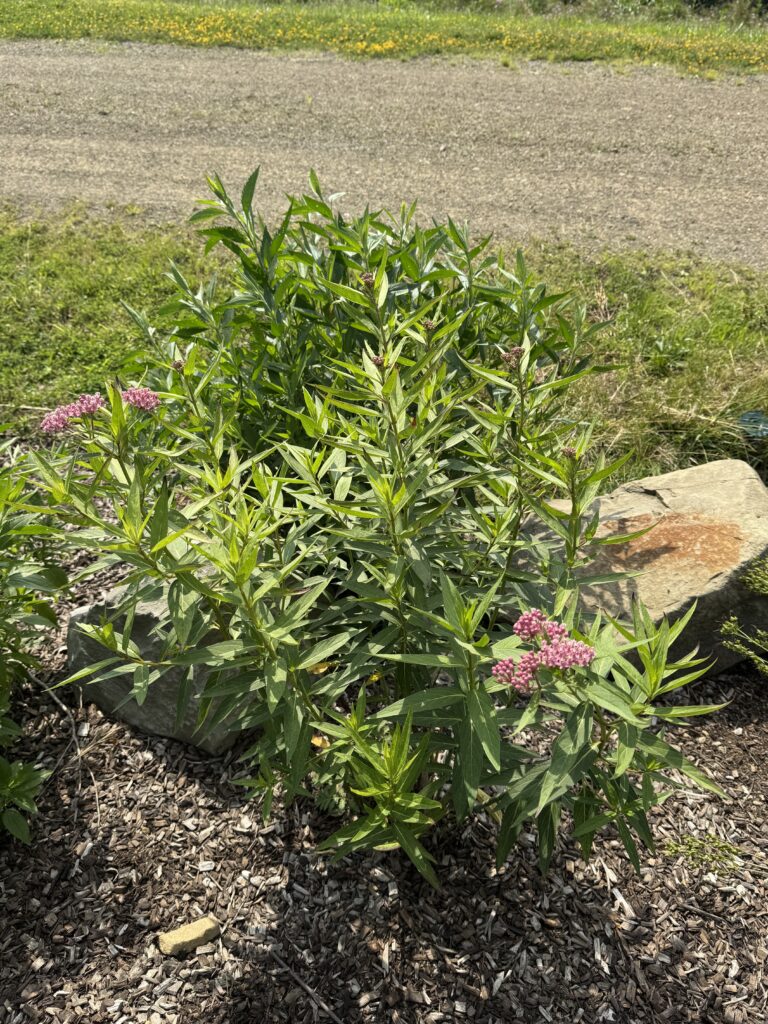
  • Swamp milkweed, unlike the more commonly seen common milkweed, prefers neutral to slightly acidic soil but will tolerate heavy clay, and is a host plant for monarch caterpillars while its showy flower clusters attract butterflies and hummingbirds.
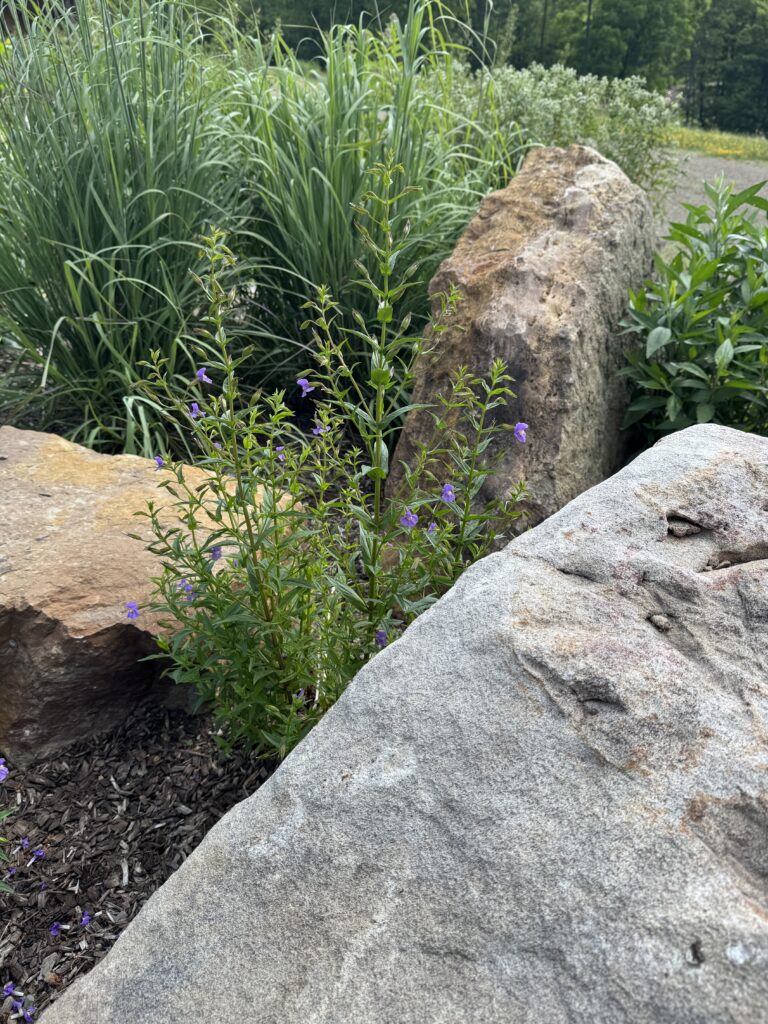
foxglove beardtongue (Penstemon digitalis) < figcaption> Foxglove beardtongue (Penstemon digitalis)along the garden’s rock-lined path.

A vine worth growing on a trellis or fence:

  • Coral honeysuckle (Lonicera sempervirens), sometimes called trumpet or red honeysuckle, prefers organically rich soil but adapts to a wide range of soils including clay, and is frequently visited by hummingbirds throughout its long spring to fall bloom period. It is also deer resistant and tolerant of black walnut, so it works well even in mixed plantings near established trees.
Bee balm in vibrant red bloom next to spiderwort in the native garden bed
Bee balm in bloom next to spiderwort, a favorite combination for attracting bees and hummingbirds.

A few practical steps to put these together:

  • Start with a soil test. Knowing your clay soil’s actual pH and nutrient levels, rather than guessing, helps you choose plants that will truly thrive instead of merely tolerate the spot.
  • Layer trees, perennials, and a vine. Trees provide long term structure and shade, perennials fill in lower layers with season long color, and a flowering vine on a trellis or fence adds vertical interest and extra nectar.
  • Build your beds with quality materials. A solid foundation of topsoil, compost, and mulch makes a real difference when you are establishing new plantings, even tough, low maintenance natives.
  • Be patient the first season. Most natives spend their first year establishing roots before putting on visible top growth. Many gardeners find that early patience leads to a lower maintenance bed in the years that follow.

We can help you build it

Whether you are starting a single native bed or reworking a larger landscape, having the right soil and mulch underneath your plants matters just as much as the plants themselves. Visit our products page to see the soil, organics, and mulch options we manufacture on site, or stop by J.A. Rutter Co. to talk through what will work best for your yard’s conditions.

You can also follow the ongoing progress of our own native pollinator garden on our blog, where we share what is working, what we would do differently, and what to plant next.


Sources:

We Test Our Topsoil, Too. Here’s Why It Matters.

a loader maching loading dirt
Quality & Transparency — Part 2

We Test Our Topsoil, Too. Here’s Why It Matters.

In last week’s post we walked through how we test our mulch. Soil gets the same treatment and in Western Pennsylvania’s clay-heavy landscape, the science behind it matters more than most people realize.

Most people don’t think too hard about where their topsoil comes from. But if you’ve ever had plants fail to thrive, seen water pool after a rain, or dug into your bed and hit something closer to concrete than earth the problem often starts underground. That’s the whole reason we have a testing process.

Every new source starts at Penn State

Anytime we bring in raw material from a new site, samples go to Penn State’s Agricultural Analytical Services Laboratory before a single yard goes into production. PSU Extension is the standard for soil analysis in Pennsylvania the same lab that farmers and homeowners across the Commonwealth have relied on for decades.

Why Penn State?

Penn State’s Agricultural Analytical Services Lab measures pH, key macronutrients, organic matter, and soil texture. Their reports include lime and fertilizer recommendations based on what the soil actually needs. Reading a PSU soil test report gives a complete picture of what you’re starting with — and that’s exactly what we need before we touch a batch.

Two tests shape every batch we make

pH Testing

Soil pH determines how well plants can access nutrients and how active soil biology is. We test the pH of every new raw material source so we know what we’re working with and whether we need to adjust our blend to reach the neutral starting point your plants need.

Particle Size Analysis

This tells us the exact breakdown of sand, silt, and clay. Too much clay and the soil compacts, smothers roots, and blocks drainage. Once we have those numbers, we fine-tune how much O38 organic material we add during screening to hit the right balance.

“Anytime we bring in raw material from a new site, that material is tested at PSU so we know exactly what pH we’re starting with.”

Jayme Matkozich, J.A. Rutter Co.

The clay problem that defines Western PA landscaping

If you’ve gardened around Pittsburgh, you already know this. Our soils run heavy. Clay particles pack tightly, leaving little room for air and water movement, blocking root growth, and locking nutrients away from plants. It’s behind most of the drainage problems, compacted beds, and struggling plants our customers come to us about.

20–40% Typical clay content in Western PA native soils
25–35% Our target clay content in finished screened soil

We strive to keep our finished screened topsoil at no more than 25–35% clay lower than what you’ll typically dig up in native Western PA soil. The O38 organic material we blend in during screening improves soil structure and creates the airflow and drainage roots actually need to grow.

We test the finished product for the same two things: pH and particle size, approximately every third batch. Because we use the same raw material for at least a full season, this frequency provides meaningful quality checkpoints without redundancy. It’s consistent with Penn State Extension’s own guidance on how often stable soil profiles need testing.

What good topsoil actually looks like

One misconception we hear constantly: people expect screened topsoil to look like the fluffy potting mix from a big-box store. That expectation leads to real confusion and sometimes real frustration.

The misconception

Good topsoil should look like fluffy bagged potting mix.

The reality

Potting mix is engineered for containers. It’s not built for in-ground beds and landscapes.

The misconception

Finer soil is better soil.

The reality

Overly fine soil compacts around roots, cutting off air and water causing slow growth, root rot, or plant death.

The misconception

Chunky topsoil is low quality.

The reality

Larger particles are essential for airflow, drainage, and root expansion in the ground.

We screen our topsoil through a ¾-inch screen by design. That screen size ensures particles are large enough to keep air pockets open and let water move through. The University of Delaware Cooperative Extension documents exactly what happens without badly formed roots, nutrient deficiencies, and drought stress even in well-watered plants.

Pair our screened topsoil with mushroom compost or more O38 for heavy clay beds, and you’re giving your plants a real foundation, not just the appearance of one.

Ready to start with the right foundation?

Our team is happy to help you figure out exactly what your project needs: soil, mulch, or both.

Talk to our team →

We Test Our Mulch. Here’s Exactly What We’re Looking For.

Quality & Transparency

We Test Our Mulch. Here’s Exactly What We’re Looking For.

There’s real concern online about whether colored wood mulch is safe — and it’s not unfounded. We’ve been making mulch since 1992, and we want to show you exactly what we do to earn your trust.

If you’ve searched “is colored mulch safe” recently, you’ve probably come across some alarming reading. The concern centers on manufacturers who use demolition debris or lumber treated with chemicals like creosote or CCA (chromated copper arsenate) in their mulch. When those chemicals leach into soil, the consequences are real: harm to plants, soil organisms, and the people and pets who spend time in the yard.

The concern is legitimate. UMass Amherst and the Ontario Urban Forest Council have both documented contamination in products from suppliers who don’t scrutinize their wood sources. Although the EPA banned CCA for residential use in 2003, treated wood from old decks, fences, and industrial structures still circulates — and can end up ground into mulch.

The dye itself, by the way, is rarely the issue. Researchers are consistent on this point: it’s the wood source that determines whether colored mulch is safe, not the colorant. Our dyes are water-based and contain no harmful chemicals — but we don’t expect you to take our word for it.

Three layers of protection before mulch reaches your yard

At J.A. Rutter, quality control isn’t a single step at the end of production — it’s built into every stage of the process.

Vendor Agreement

Every supplier who brings wood to our facility must read and sign our Dump Agreement before a single piece of material is accepted. It spells out exactly what we will and will not take for use in our colored wood mulch.

On-Site Load Inspection

Every incoming load is dumped on a dedicated asphalt sorting pad. Our staff scrutinizes each load and rejects anything that doesn’t meet our standards — before it touches production. The same scrutiny applies to material coming in through our pallet wood and green wood recycling programs.

Monthly Independent Lab Testing

Every month, samples of our wood mixture are sent to an independent laboratory and tested against Pennsylvania DEP safety parameters for 17 potential contaminants.

“In all the years of monthly testing, the majority of these substances are non-detectable or present in trace amounts significantly below safely accepted levels.”

— Jayme Matkozich, J.A. Rutter Co.
Monthly Independent Lab Test Panel
pH
Arsenic
Barium
Boron
Cadmium
Chloride
Chromium
Copper
Lead
Mercury
Molybdenum
Nickel
Nitrate Nitrogen
PCBs
Selenium
Sulfate
Zinc

These 17 substances cover everything regulators and researchers have identified as potential concerns in recycled wood products. The Pennsylvania DEP sets the acceptable thresholds; we hold ourselves to those standards every single month, year after year.

The honest answer about colored mulch safety

It depends entirely on the manufacturer. That’s not a hedge — it’s the truth. The concern about contaminated mulch is real, and it exists because not every producer does what we do. Our vendor agreement, sorting pad, and monthly testing program exist precisely because we know what can go wrong when those safeguards aren’t in place.

Pet and People Safe

“My dogs have been munching on mulch in our backyard since we began manufacturing the product back in 1992. If you know what massive animal lovers we are, you know we would never put anything that would harm them in our products.” — Jayme Matkozich

We’ve also been open about products we chose not to make. If you haven’t read why we never made rubber mulch, it’s worth a few minutes — it tells you a lot about how we think about what goes into the landscape.

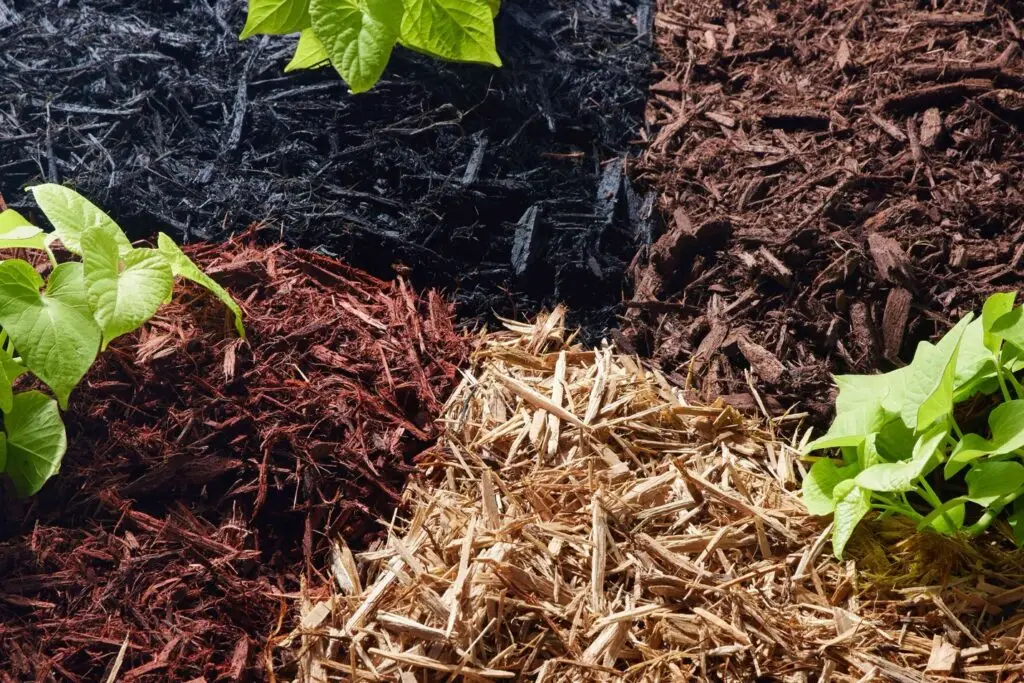
Prefer to skip colored mulch entirely? We have options.

If you’d rather go fully natural, our mulch line has you covered:

  • Natural Bark Mulch — single or double shred, continuously decomposes to feed your soil.
  • O38 — organic conditioner and stand-alone mulch made from leaves, grass clippings, brush, and stumps. No animal waste, no food waste.
  • Economulch — from our organics line, ground from brush, grass, leaves, and stumps.

Have questions? Browse our FAQ or reach out to our team directly. Everything we make is locally sourced, produced, and processed — and we’re always happy to talk through what’s right for your project.

Does Mulch Attract Bugs?

Does Mulch Attract Bugs? | J.A. Rutter Co.
Landscape Education

Does Mulch Attract Bugs?

What Homeowners and Landscape Professionals Need to Know

Published by J.A. Rutter Co.  |  Monroeville, PA

If you have ever mulched a garden bed and then started to wonder whether you just invited every bug in the neighborhood to move in, you are not alone. It is one of the most common concerns we hear from homeowners and landscape professionals at J.A. Rutter Co. The short answer is this: mulch does interact with insects, but the full picture is far more nuanced than the fear suggests, and knowing the facts will help you mulch smarter.

Here is what the research actually says, and what you should be doing to keep your landscapes healthy and pest-free.

Mulch and Insects: Setting the Record Straight

Yes, organic mulch does attract insects. But here is the critical context: the vast majority of those insects are beneficial. According to Nature’s Way Resources, in organic or living mulches, beneficial insects outnumber harmful pest species by 100 to 1 or more.[1] Organic mulches give beneficial insects, such as predatory ground beetles and hunter spiders, a place to shelter during the day while they patrol your garden for pests at night.

In contrast, inorganic mulches (plastic sheeting, rubber) support a less favorable ratio, sometimes even tipping toward pest species dominance, because they do not support the rich microbial and insect food web that keeps pest populations in check.

The insects that mulch can harbor, including millipedes, sowbugs, centipedes, earwigs, and ground beetles, are largely decomposers and predators. They break down organic material, improve soil structure, and feed on the pests that actually damage plants. Removing them entirely would harm your landscape far more than help it.

The Termite Question: Fact vs. Fear

Termites are the pest that gets the most attention in mulch discussions, and understandably so, given that they cause an estimated $5 billion in property damage nationwide each year. But the relationship between mulch and termites is widely misunderstood.

Iowa State University Extension researchers are clear on this point: there is no evidence that moist mulch conditions attract termite foragers from the surrounding landscape.[2] Termites do not detect your mulch from across the yard and come running. Rather, when termites encounter suitable conditions during their normal foraging, including moisture, cover, and a food source, they are more likely to remain and feed.

The problem is not that mulch summons termites; it is that improperly placed mulch makes it easier for termites already present in your soil to reach your home’s structure.

Iowa State University Extension & University of Maryland Structural IPM Program

Research from the University of Florida/IFAS tested six common mulch types, including cypress, eucalyptus, melaleuca, pine bark, pine straw, and utility mulch, and found that termites fed on all of them to varying degrees. Melaleuca mulch was the most resistant to termite feeding, while utility pruning mulch (mixed species) saw the highest termite consumption.[3]

Separate research from the University of Maryland’s Structural IPM Program, conducted in the field around College Park, studied how shredded hardwood, pine bark nuggets, pea gravel, and shredded eucalyptus bark affected foraging patterns of subterranean termites.[6]

The environmental conditions mulch creates, specifically retained moisture and insulated soil temperatures, matter far more than what the mulch is made of.

University of Maryland Structural IPM Program — Field Research, College Park, MD

University of Florida research also found that termites rarely survive commercial mulch production, because the heat generated during processing is lethal to them.[3]

The risk is not termites traveling in your mulch delivery; it is the conditions mulch creates adjacent to your foundation once it is installed.

University of Florida / IFAS Extension

The Real Problem: Installation Errors, Not Mulch Itself

Across university research and extension guidance from Penn State, Iowa State, and the University of Florida, one theme emerges consistently: insect problems attributed to mulch are almost always the result of how mulch is applied, not the fact that it was applied.

Insect problems attributed to mulch are almost always the result of how mulch is applied, not the fact that it was applied.

Penn State Extension, Iowa State University & University of Florida — Extension Research Consensus

The most common installation mistakes that create pest problems:

  • 1 Applying mulch too deep. Penn State Extension recommends no more than 2 to 3 inches of mulch for landscape beds.[4] Thick, wet mulch heats up as it decomposes, with internal temperatures reaching as high as 140 degrees Fahrenheit, and creates an ideal environment for moisture-loving insects such as carpenter ants and termites. Deep mulch also promotes rot in tree trunks and root zones.
  • 2 Piling mulch against tree trunks — sometimes called “volcano mulching.” According to Penn State Extension, mulch piled against the trunk favors moisture-loving insects that can colonize and expand decayed areas of the wood.[4] Rodents such as voles and mice also tunnel under deep mulch and gnaw on the inner bark, sometimes girdling and killing young trees.
  • 3 Placing mulch directly against the home’s foundation. The University of Florida/IFAS Extension specifies keeping at least a 12-inch zone adjacent to the foundation free of mulch or other ground covers.[3] This creates a dry inspection zone that termites are unlikely to cross and allows visual detection of mud tubes. Building codes in many jurisdictions also require a 6-inch gap between mulch and siding.
  • 4 Adding new mulch on top of old without checking depth. Old mulch compacts over time. Landscape professionals should check depth before each application and remove or redistribute excess before adding a fresh layer. Raking and breaking up matted layers also improves airflow and reduces moisture retention.
  • 5 Using unfinished or partially decomposed compost mulch near foundations. This type of material generates heat and attracts decomposer insects in higher numbers. Well-cured compost mulch is low-risk and provides excellent soil benefits.

Which Mulch Types Are Lower Risk for Pest Problems?

Mulch type matters, especially for applications near structures. Here is how common options compare based on available research:

Hardwood Bark Mulch

J.A. Rutter’s double-shredded hardwood bark is produced from locally sourced hardwoods, decomposes to enrich soil over time, and when properly applied at 2 to 3 inches, supports a healthy beneficial insect community. Keep it away from foundations and avoid burying root flares.

Colored Wood Mulch

J.A. Rutter’s colored mulch, including Cherry Brown, Black, Dark Brown, Red, and Saffron, is manufactured on-site from high-quality recycled materials using non-toxic colorants. Pest interaction depends entirely on application depth and placement, not the color or dye.

Compost & Organic Blends

Well-cured compost mulch carries an extra benefit: high levels of beneficial microbes tend to parasitize termite larvae, making composted mulches less hospitable to termite establishment than raw wood chips.[1] See Rutter’s organic line.

Cedar Mulch

Cedar’s natural oils repel ants, moths, mosquitoes, and carpet beetles.[8] Best reserved for areas where pest control is the priority, such as along foundation perimeters, rather than planting beds where microbial activity matters.

Stone & Gravel

Stone and pea gravel eliminate organic food sources, making them the lowest-risk choice for termite feeding. However, a University of Florida study found favorable moisture conditions persist regardless of mulch type — and stone does not improve soil health.[3]

Mulch Also Protects Against Pests

The insect conversation around mulch tends to focus exclusively on risk, but research shows mulch can actively reduce certain pest problems. A study cited by Nature’s Way Resources found that damage from Colorado potato beetles was 2.5 times higher in un-mulched garden plots compared to mulched ones, because straw mulch supported populations of larval predators that kept pest beetles in check.[1]

Penn State Extension’s Integrated Pest Management (IPM) guidelines note that only 3 to 5 percent of insect species are actually harmful, and that most pests have natural enemies, including birds, toads, and beneficial insects, to keep them in check.[5] A well-mulched landscape that supports these natural predators is a more resilient, lower-maintenance landscape.

Best Practices: How to Mulch Without Creating Pest Problems

Whether you are a homeowner putting down a few yards in your flower beds, or a landscape contractor managing dozens of commercial accounts, these guidelines, drawn from Penn State Extension, the University of Florida/IFAS, Iowa State University, and the University of Maryland, represent the current research consensus:

  1. Apply 2 to 3 inches deep. This is enough to suppress weeds and retain moisture without creating the anaerobic, pest-hospitable conditions that come with deeper applications.[4]
  2. Keep a 12-inch bare zone at the foundation. University of Florida/IFAS Extension is explicit: no mulch, or at most a 1-inch layer, within 12 inches of the foundation. This gap also allows you or a pest control professional to spot mud tubes during routine inspection.[3]
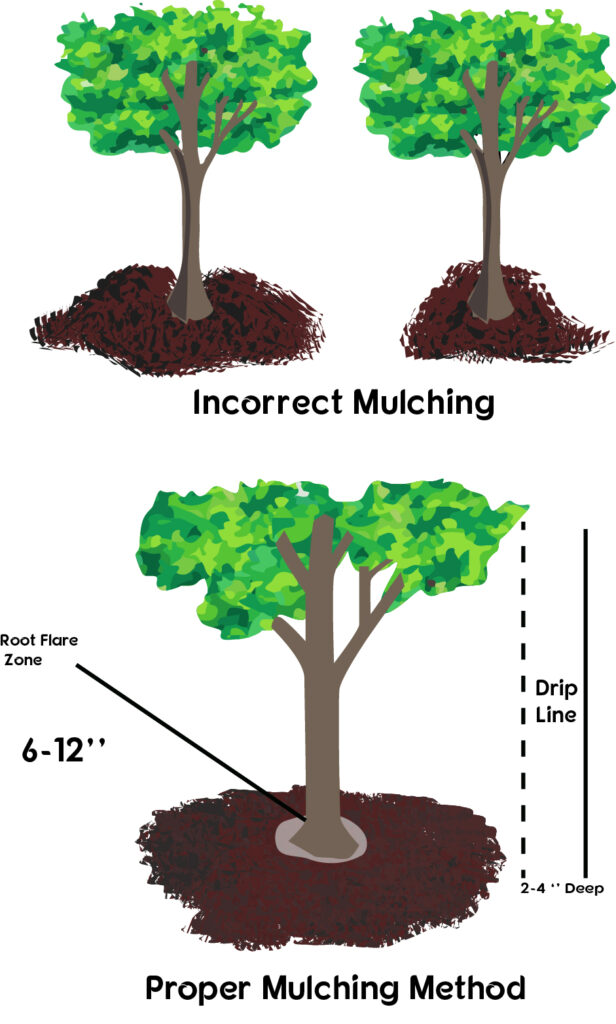
  3. Keep mulch away from tree trunks. Pull mulch 3 to 5 inches from young trees and 8 to 10 inches from mature trees, exposing the root flare. Penn State Extension notes that trees often show rapid improvement in color and vigor once buried root flares are uncovered.[4]
  4. Check depth before every seasonal refresh. Rake and break up old compacted mulch before adding new material. If you are already at 3 inches, you may only need to turn what is there rather than adding a full new layer.
  5. Ensure proper drainage and grading. Iowa State University and the University of Florida both emphasize that moisture management matters as much as mulch type. Grade your landscape to direct water away from the foundation with at least a 5 percent slope for the first 10 feet, ensure gutters discharge at least 6 feet from the foundation, and keep irrigation heads at least 1 foot from exterior walls.[2]
  6. Use well-cured, locally sourced mulch. J.A. Rutter’s products are manufactured on-site in Monroeville, not transported from unknown sources, allowing consistent quality control. Locally processed mulch has gone through the heat cycle of production, significantly reducing the likelihood of viable pest populations in the product itself.

The Bottom Line

Mulch does not cause insect infestations. Improperly applied mulch, whether too deep, too close to structures, or piled against tree trunks, creates conditions that can worsen existing insect problems. Apply mulch correctly, choose a quality product, and you get all the benefits: moisture retention, weed suppression, soil temperature moderation, improved soil health, and a healthier landscape ecosystem.

At J.A. Rutter Co., we have been producing landscape supplies in western Pennsylvania since 1972. Our mulch is locally sourced, manufactured on-site, and sold by weight, so you know exactly what you are getting.

Browse Our Mulch Call (724) 327-1101 Visit Our Yard

Sources & Citations

  1. Nature’s Way Resources. Insects, Pest and Disease Associated With Mulch. natureswayresources.com
  2. Iowa State University Extension and Outreach. Does landscape mulch lead to termites in your home? Yard and Garden. yardandgarden.extension.iastate.edu
  3. University of Florida/IFAS Extension, Pinellas County. Termites and Mulch. blogs.ifas.ufl.edu
  4. Penn State Extension. Mulching Landscape Trees. Vincent Cotrone, David R. Jackson. extension.psu.edu
  5. Penn State Extension. Creating Healthy Landscapes. IPM / Plant Health Care guidelines. extension.psu.edu
  6. University of Maryland Structural IPM Program / Pest Control Technology. Termites & Mulch. pctonline.com
  7. EcoGuard Pest Management. Does Mulch Attract Termites? Complete Guide to Safe Mulching. ecoguardpestmanagement.com
  8. Davey Tree Expert Company. What Mulch is Best for Repelling Bugs? blog.davey.com
  9. Devonian Landscape. Does Mulch Attract Bugs? devonianlandscape.com
  10. NCBI/PMC. Organic Mulch Increases Insect Herbivory by the Flea Beetle Species, Disonycha glabrata, on Amaranthus spp. MDPI/PMC, 2020. ncbi.nlm.nih.gov
  11. J.A. Rutter Co. About Us & Mulch Product Pages. jarutter.com

Mold: What’s This Gross Stuff On My Mulch?

an Image of Artillery fungus growing in chipped mulch

You step outside on a damp morning, coffee in hand, ready to admire your tidy garden beds. And there it is. A neon-yellow blob of something foamy is squatting on your freshly laid mulch. Or maybe it’s a cluster of tiny brown cups with little “eggs” inside, or a patch of white fuzzy threads creeping between the wood chips. Whatever it is, it’s definitely gross, and you want it gone.

Before you reach for the bleach, take a breath. That strange stuff on your mulch is almost certainly harmless, and understanding what it is can save you a lot of unnecessary panic (and unnecessary scrubbing). Here’s your complete guide to the weird world of mulch, mold, and fungi.

Apr–Oct When mulch fungi are most likely to appear, especially after rainy weather Source: University of Massachusetts Amherst Extension
95% Reduction in artillery fungus sporulation when 40% mushroom compost is blended into mulch Source: Penn State Extension / ChromaScape research
18 ft How high artillery fungus can launch its sticky tar-like spore packets toward your siding or car Source: Iowa State University Extension

Why Does Mold Grow on Mulch in the First Place?

Mulch is organic matter (shredded wood, bark, or other plant material), and organic matter decomposes. That’s not a flaw; it’s the entire point. As the Pennsylvania State University Extension explains, “the primary organisms involved with their decomposition are bacteria and fungi, which derive their energy for growth from the carbon-based compounds found in wood and bark. These compounds include cellulose, lignin, and simple sugars.”1

In short, your mulch is a buffet, and fungi are the guests. They’re not invaders; they’re natural components of the mulch ecosystem. The University of Massachusetts Amherst notes that these organisms “are not harmful to landscape plants, and no known health hazards are associated with them unless they are eaten.”2 You can generally expect to see fungal growth from April through October, especially following rainy weather.2

The specific conditions that trigger a visible outbreak are warmth, moisture, and compaction. When mulch is applied too thickly, the bottom layers stay permanently moist and poorly aerated, creating a perfect incubator for fungal growth.3

The Usual Suspects: A Field Guide to Mulch Mold

1. Slime Mold (“Dog Vomit Fungus”)

What it looks like: A bright yellow, orange, or white foamy mass, sometimes several inches to over a foot across, with a texture that has been memorably compared to dog vomit. It seems to appear overnight.

What it actually is: Despite the name, slime mold isn’t really a fungus at all. According to Rutgers Cooperative Extension, slime molds (genus Physarum) “are, in fact, not a fungus, but are soil-dwelling amoeba, a single-celled organism that contains multiple nuclei when they clump together to form a single mass.”4 The Iowa State University Extension describes them as “primitive fungal-like organisms” that feed on bacteria and other microorganisms living in the mulch.5

Is it dangerous? No. Slime molds do not harm landscape plants. Left alone, they dry up within a few days and turn into a white, powdery mass.2 If you find it offensive (and who could blame you?), simply scoop it up and discard it in your household trash or compost pile.

Fun fact: The Ohio State University Extension notes that if a slime mold persists on plant foliage for a long time, it could potentially inhibit photosynthesis, though this is unusual. In the mulch itself, it’s purely cosmetic.6

2. Mushrooms

What they look like: Classic toadstool shapes in various colors and sizes, from less than an inch to several inches tall. Some disappear within a day or two; others can persist for a full growing season.

What they actually are: The fruiting bodies of fungi that have colonized your mulch’s wood and bark material. Penn State Extension notes that “many different fungi produce mushrooms,” and they come in a wide variety of colors, shapes, and sizes.1

Are they dangerous? The fungi themselves are not harmful to your plants. However, some mushroom species are toxic to people and pets if eaten. Never eat a mushroom growing in your landscape unless you are an experienced mycologist who can positively identify the species.

What to do: You can knock them over, pull them up, or just let them decompose on their own. Once the food source below is consumed, they’ll stop appearing.3

3. Bird’s Nest Fungus

What it looks like: Tiny cups (usually brown, gray, or white) about one-quarter inch in diameter, each containing small round “eggs.” They grow in clusters and really do look like miniature bird’s nests, which makes them one of the more charming fungal inhabitants of your garden.

What they actually are: A true fungus (genera Crucibulum and Cyathus). The “eggs” are structures called peridioles, which are spore-containing masses. According to the University of Delaware Cooperative Extension, “spore bodies (eggs) are splashed out of cups during rains, or moved around by animals or man, spreading spores of the fungus.”7

Are they dangerous? Generally no. Penn State Extension notes they “may grow in large areas of mulch, but they are not a problem.”1 The spores can occasionally stick to surfaces, but unlike artillery fungus (see below), they’re easily removed and don’t leave a stain.

4. Stinkhorn Fungus

What it looks like: A slimy, foul-smelling stalk topped with a dark, gooey cap. Stinkhorns start as an egg-like structure in the soil and emerge during cool, wet conditions in late summer and fall. Multiple species exist; some have an unmistakably phallic shape.

What they actually are: Fungi in the genus Mutinus and related genera. The Iowa State University Extension explains that stinkhorns are “aptly named as they are horn-shaped and foul-smelling.”5 The odor is intentional, as it attracts flies that carry the spores away on their bodies.

Are they dangerous? No. Rutgers Extension notes that “despite the odor and sometimes distinctive coloration, these fungi are not considered toxic to plants or poisonous to people.”4 They’ll shrink and dry out on their own within a few days after the weather dries.

5. White Mycelium

What it looks like: A cotton-like white film or network of threads running through and across the surface of your mulch. It may look alarming, but it’s actually just the vegetative body of a fungus: the underground “root system” made visible.

What it actually is: Mycelium is the main body of a fungus, and all the other fungi listed here have it. When you see white mycelium at the surface, it’s a sign of active decomposition. It typically disappears on its own as the mulch dries out.11

Is it dangerous? No. Raking the mulch and exposing the threads to sunlight will usually dissolve them.3

The One You Actually Need to Worry About: Artillery Fungus

Most mulch fungi are harmless curiosities. Artillery fungus (Sphaerobolus spp.) is the exception, and it deserves its own section.

What it looks like: Tiny cream-colored or orange-brown cups, roughly 1/10 of an inch in diameter, each containing a dark round spore mass. Areas of mulch with artillery fungi may appear matted and lighter in color than the surrounding mulch.1

What it actually is: A wood-decay fungus. Its genus name, Sphaerobolus, literally translates from Greek as “sphere thrower,” because that’s exactly what it does.10 The University of Delaware explains the mechanism: “Accumulation of water and nutrients in the fruiting body eventually leads to a pressure release of the spore which is shot toward any light source up to a distance of several feet.”7

Those tiny spore packets (sticky, black, and tar-like) orient themselves toward light, which means they head straight for your light-colored house siding, your car, your fence, or anything pale and reflective nearby. The spores can be propelled as high as the second story of a house.1 Iowa State University notes they “can be launched up to 18 feet into the air.”2

Are they dangerous? Not to people or plants. To your property, however, the answer is yes. Once the spore mass hardens on a surface (which happens quickly), it becomes extremely difficult to remove without damaging the surface beneath. Penn State Extension describes the spots as resembling “a small speck of tar.” Fresh spots within 24 to 48 hours can sometimes be removed with vegetable oil, but hardened spots often require professional cleaning and may leave a permanent stain.3

What to do:

  • Rake mulch regularly to disturb fungal growth and help the surface dry out.
  • Replace hardwood mulch near your home’s foundation with large pine bark nuggets or natural bark mulch, which are less hospitable to Sphaerobolus.8
  • Penn State research found that blending at least 40% mushroom compost (the byproduct of edible mushroom production) into landscape mulch can suppress artillery fungus sporulation by up to 95%, and it also boosts plant growth.9

How to Reduce Mold in Your Mulch (Without Giving Up Mulch Entirely)

You don’t have to swear off mulch. You just need to be smarter about it. Here are evidence-backed strategies for keeping fungal growth to a minimum.

  • Depth matters Keep mulch at 2 to 3 inches deep. At 4 inches or deeper, the bottom layer stays permanently moist and low in oxygen, creating ideal conditions for fungal mats, slime mold, and water mold.3 Penn State recommends never exceeding 2 to 3 inches, both for mold prevention and for healthy root growth.1
  • Rake regularly Turning the mulch improves airflow, exposes fungal growth to sunlight, and helps the surface dry out. This is one of the simplest and most effective preventive measures.14
  • Choose your mulch wisely Cedar and cypress mulches contain natural oils that resist fungal growth.11 Large pine bark nuggets are also more resistant than shredded hardwood because their larger size allows rain to drain through rather than being absorbed.16 Penn State tested 27 different mulch types and found that large pine bark nuggets were among the most resistant to artillery fungus.8 Browse J.A. Rutter’s mulch options to find the right fit for your beds.
  • Water less frequently If you water your plants every day, your mulch stays perpetually damp, which is the perfect environment for mold. Try watering once or twice per week to allow drying between waterings.14
  • Keep mulch away from plant bases and building foundations Piling mulch against tree trunks, plant stems, or house siding creates moisture traps that invite rot, disease, and (in the case of artillery fungus) the perfect launching pad for sticky spores. Keep mulch pulled back 2 to 3 inches from any plant base, and consider using non-organic ground cover within 10 to 20 feet of your home’s exterior.12
  • Mix in compost Research from Penn State Extension found that replacing or mixing at least one-third of wood chip mulch with well-finished mushroom compost significantly reduces artillery fungus populations, because the compost introduces competing microorganisms that crowd out Sphaerobolus.3 This strategy works for other nuisance fungi as well.

The Bottom Line

That gross stuff on your mulch is, in almost every case, a sign that your mulch is doing exactly what it’s supposed to do: decomposing, cycling nutrients, and supporting a complex microbial ecosystem. Slime mold, bird’s nest fungus, stinkhorns, mushrooms, and white mycelium are all natural, harmless parts of the decomposition process.

The one genuine problem child is artillery fungus, which is worth taking seriously if you have light-colored siding or a car parked nearby. Switch to pine bark nuggets or cedar mulch in those areas, mix in mushroom compost, keep the depth at 2 to 3 inches, and rake it regularly.

Your mulch bed isn’t broken. It’s alive. And that’s a good thing.

References

  1. Penn State Extension. What Is Growing in My Landscape Mulch? Mushrooms, Slime Molds, and Fungus.
  2. University of Massachusetts Amherst. Fungi in Mulches and Composts.
  3. GetHandyOutdoors.com. Mulch Mold & Fungus: How to Treat It and Stop It Coming Back.
  4. Rutgers Cooperative Extension. Control of Nuisance Fungi in Landscape Mulch.
  5. Iowa State University Extension. Managing Strange-Looking Fungi in Landscape Mulch.
  6. Ohio State University Extension (as cited in AskMaryStone.com).
  7. University of Delaware Cooperative Extension. Artillery Fungus and Other Things That Grow in Mulch.
  8. AskMaryStone.com. Slime Mold & Artillery Fungus.
  9. ChromaScape/Amerimulch. How to Protect Your Mulch Supply from Artillery Fungus.
  10. ChromaScape/Amerimulch. Artillery Fungus: Species Overview.
  11. Devonian Landscape. How to Prevent Mold in Mulch.
  12. SS Landscape Supply. Mulch Types Compared.
  13. Topsoil.com. Pine Mulch vs Cedar Mulch.
  14. Cal Blend Soils. How to Deal with Mulch Fungus.
  15. Ask Extension / Oregon State University. Mulch Without Artillery Fungus?
  16. Ask Extension. Cited source on bark nugget drainage and fungal resistance. ask.extension.org

Why We Never Made Rubber Mulch, and Why That Decision Matters

A picture showing rubber mulch and comparing it to wood mulch
From the desk of JA Rutter & Co.

Why We Never Made Rubber Mulch, and Why That Decision Matters

A look at the hidden environmental and safety risks of rubber mulch, and our commitment to doing right by families and the land.

JA Rutter & Co.  ·  Landscape Products  ·  Monroeville, Pennsylvania

Over the years, people have asked us plenty of times: “Do you carry rubber mulch?” Our answer has always been no, and it is not because we could not. It is because we chose not to. That decision did not happen by accident. It happened because we did our homework, listened to our community, and made a call we still stand behind today.

Companies market rubber mulch as a miracle product. It lasts longer than wood mulch, it does not decompose, it cushions falls on playgrounds. At first glance, it sounds like a no-brainer. But the more you learn about what goes into rubber mulch and what it does over time, the picture gets a lot darker.

What rubber mulch actually is

Rubber mulch comes from shredded used tires, the same tires that roll down our highways for years, picking up road chemicals and breaking down under heat and pressure. When manufacturers grind those tires up and spread them across playgrounds, garden beds, and landscaped areas, they do not just sit there harmlessly. They bring everything baked into them along for the ride.

Tires are complex products. They contain synthetic rubber, carbon black, steel wire belts, zinc, lead, and a range of chemical compounds including polycyclic aromatic hydrocarbons (PAHs), some of which are known carcinogens. Shredding a tire does not neutralize those compounds. It exposes more surface area for them to leach out.

Environmental concern: what the research shows

A peer-reviewed study published in the journal Chemosphere and published on PubMed found that rubber mulch leachate contains significantly higher concentrations of zinc than wood mulch, and that zinc levels increased with higher temperatures and lower soil pH conditions that are common in many landscapes.

A Washington State University research review concluded that toxic substances leach from rubber as it degrades, contaminating soil, landscape plants, and associated aquatic systems. It also cited Bucknell University research finding that rubber leachate from car tires can harm entire aquatic communities of algae, zooplankton, snails, and fish.

The USDA Agricultural Research Service, drawing on more than 20 years of research on zinc in soils and plant materials, concluded that ground or chipped tire material should never go into gardens or landscaping based on the zinc factor alone. The University of Illinois Extension has also documented symptoms of leaf yellowing, reduced tree growth, and increased tree mortality at sites where rubber mulch saw use, along with elevated zinc levels in soil tests.

It gets hot. Very hot.

One of rubber mulch’s lesser-known dangers is temperature. Rubber absorbs heat from the sun far more readily than wood or natural materials. Researchers have recorded rubber mulch surface temperatures reaching 150 degrees Fahrenheit and above under direct summer sun, hot enough to cause second-degree burns on a child’s bare skin.

Think about where rubber mulch sees its most common use: playgrounds. The very places where kids kick off their shoes and run around. The surface that should protect them from a fall can turn into a burn hazard on any sunny afternoon.

This heat is also a significant problem for plants sharing a landscaping bed with rubber mulch. Unlike natural mulch, which insulates soil and moderates temperature, rubber absorbs and radiates heat downward. Research cited by the University of Missouri Extension documents that this heat transfer can stress and damage the roots of delicate plants, altering the microclimate around them in ways that organic mulch never would.

Source: Rethinking Rubber: The Hidden Dangers of Rubber Mulch (citing University of Missouri Extension, 2022)

If There’s Smoke There’s Fire

While both rubber and wood mulch are flammable, rubber mulch falls into a different category when it comes to fire behavior. A University of Nevada Cooperative Extension study found that shredded rubber burned at the hottest average temperature of any mulch tested, exceeding 630 degrees Fahrenheit, with flame heights averaging over three feet, and water could not put it out. Consumer Reports independently confirmed that rubber mulch burns hotter and faster than wood mulch and is significantly harder to put out.

Sources: Fire Safe Marin / University of Nevada Cooperative Extension study  ·  Nature’s Way Resources: Fire Risk Related to Mulch (citing Consumer Reports)
150°F+
Surface temperatures rubber mulch reaches under direct summer sun, enough to cause second-degree burns
630°F+
Temperature at which rubber mulch burns in testing, the hottest of any mulch type studied, with flames exceeding three feet
10+ yrs
How long rubber mulch persists in the environment, leaving chemicals and wire behind throughout

The metal wire problem, a hidden hazard in plain sight

Here is the one that stops most parents cold when they hear it: steel belt fragments.

Modern tires use steel wire belts woven throughout the rubber for reinforcement. When shredding tires to make rubber mulch, those steel wires break apart. Even manufacturers who advertise their product as 99.9% wire-free acknowledge that steel fragments can remain, meaning every ton of rubber mulch a playground receives may still contain pieces of exposed metal wire.

Safety hazard: cited sources

Consumer Reports tested rubber mulch samples and found pieces of steel and nylon in the product, recommending against its use on playgrounds. The WSU Extension research review cites this finding directly. The U.S. Consumer Product Safety Commission (CPSC) has also been conducting ongoing research into the health and safety risks of recycled tire materials that playground designers use as surfaces, a review that covers chemical exposure as well as physical hazards.

Industry sources acknowledge that even products advertised as 99.9% wire-free can still contain up to 2 pounds of steel wire per ton of rubber mulch delivered. That wire, described as high-tensile-strength steel used to keep tires road-ready, is not soft or flexible.

The problem does not stop at installation. As rubber mulch breaks down over years of use and weathering, it can continue releasing wire fragments that never showed at the surface to begin with. Once installers spread the mulch, no easy screening method can catch them.

The “it does not decompose” problem

Manufacturers often pitch durability as rubber mulch’s biggest selling point. Wood mulch breaks down over a season or two. Rubber mulch sticks around for a decade or more. But that longevity is also the problem.

Natural mulch decomposes because soil organisms, bacteria, fungi, and insects break it down and return it to the earth. That process feeds the soil. It improves structure, adds organic matter, and supports plant life. Rubber mulch cannot do any of that. It just sits there, slowly leaching chemicals, heating up in the sun, and leaving nothing behind for the soil when someone eventually removes it.

And when it does finally need to come out? Rubber mulch is notoriously difficult to dispose of. Composting is not an option. Chipping it further is not possible either. In many cases, it ends up in a landfill, which is exactly where the original tires were heading before someone turned them into mulch in the first place. The recycling story does not have a clean ending.

Why we chose a different path

At JA Rutter, our business has always been rooted in this community. When we think about the products we put into the landscape, we think about what they leave behind. We think about kids playing in backyards, water running off into local streams, and soil that has to grow things for generations.

Natural wood mulch is not perfect. It needs to be refreshed. But it feeds the soil as it breaks down, it does not leach heavy metals, it does not become a burn hazard in July, and it does not hide steel wire fragments where children play. For us, the tradeoffs have always been clear.

We made the decision not to carry rubber mulch because it was the right one for the communities we serve. That has not changed. And if you are weighing your options for a playground, garden bed, or landscaping project, we hope this gives you something useful to think about.

We are always happy to talk through the right mulch or ground cover for your specific needs. Natural options have come a long way, and there is almost certainly a better fit than rubber for whatever you are working on.

Have questions about mulch, groundcover, or landscape products? Give us a call or stop by our yard on Old William Penn Highway. We are here to help you make decisions you will feel good about, for your yard, your family, and the ground beneath your feet.

The team at JA Rutter & Co., Monroeville, PA
5 Signs Your Job Site Is Ready for Mulch | J.A. Rutter Co.
J.A. Rutter Co. · Landscape Supply
Contractor Tips & Field Guides

5 Signs Your Job Site Is Ready for Mulch
(And 2 Signs It’s Not)

Mulching looks simple on the surface — but timing it wrong, or skipping a few steps, can create headaches that cost you labor hours and leave clients unhappy. Before you haul in a load of material, run through this quick checklist.

J.A. Rutter Co.  ·  Landscape Supply Tips
✓  Green Lights

The 5 Signs You’re Good to Go

1

Edging is clean and defined

Beds should be cut before mulch goes down — not after. Fresh edges give the mulch a clean boundary and keep it from bleeding into the lawn. If edging hasn’t been done, hold off.

2

Existing mulch is below 2 inches deep

Layering new mulch on top of thick old mulch creates a soggy mat that blocks water and air from reaching the soil. If you’re already at 3+ inches, rake out the old material before adding fresh. Two to three inches total is the target depth. For a deeper look at depth, application, and product quality, see our Top Tips for a Great Mulch Job.

3

Weeds have been treated or pulled

Mulch suppresses future weeds — it doesn’t kill the ones already there. If you lay mulch over active weed growth, you’re just giving them a blanket. Clear the bed first. Penn State Extension explains that mulch works by blocking sunlight from reaching weed seeds — not by eliminating existing growth.

4

The soil isn’t waterlogged

After heavy rain, give the bed a day to drain before mulching. Trapping wet soil under mulch invites mold, fungus, and root problems. If you press your boot into the bed and water pools, it’s not ready. According to Penn State Extension, mulching over waterlogged soil only makes the problem worse by preventing evaporation of excess moisture.

5

The client has approved the product and color

Dark brown, cherry brown, red, natural — these look dramatically different once they’re spread. Confirm the product before you order a bulk load. Nothing wastes a crew day faster than a color the client hates. Browse our full mulch colors and products before your next order.

🌿
✕  Red Lights

2 Signs to Hold Off

!

New plants haven’t settled yet

Freshly installed annuals and perennials need a week or two before mulching. Mulching too soon can trap heat against tender stems. Let the plants establish, then mulch.

!

You’re mulching against tree trunks

Piling mulch against the base of a tree — the classic “mulch volcano” — causes bark rot and attracts pests. Keep mulch pulled back 3–4 inches from the trunk and keep it flat, not mounded. Penn State Extension urban foresters warn this is one of the most damaging and widespread mistakes in landscape maintenance.

Ready to Order?

At J.A. Rutter, we carry 5 colors of dyed mulch, natural bark mulch, and our organics line in bulk — ready for pickup or job site delivery. Questions about product selection or volume estimates? Give us a call — we’re happy to help you plan. Or check out our FAQ page for quick answers on load sizes, delivery, and more.

Contact Us

Happy Arbor Day!

A love letter to the mightiest tree in the neighborhood

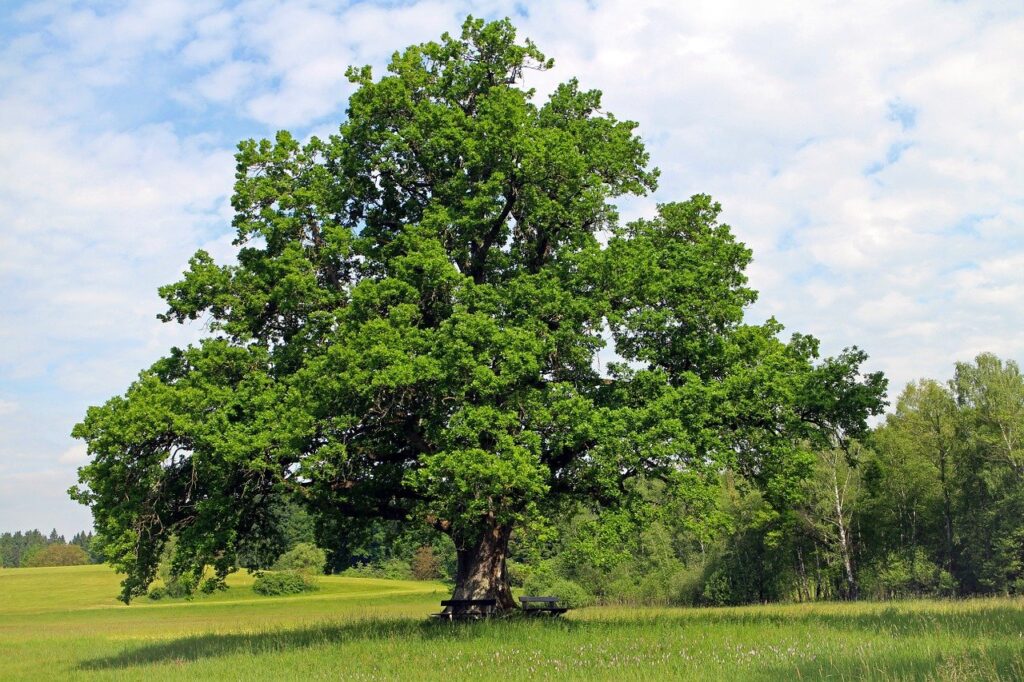
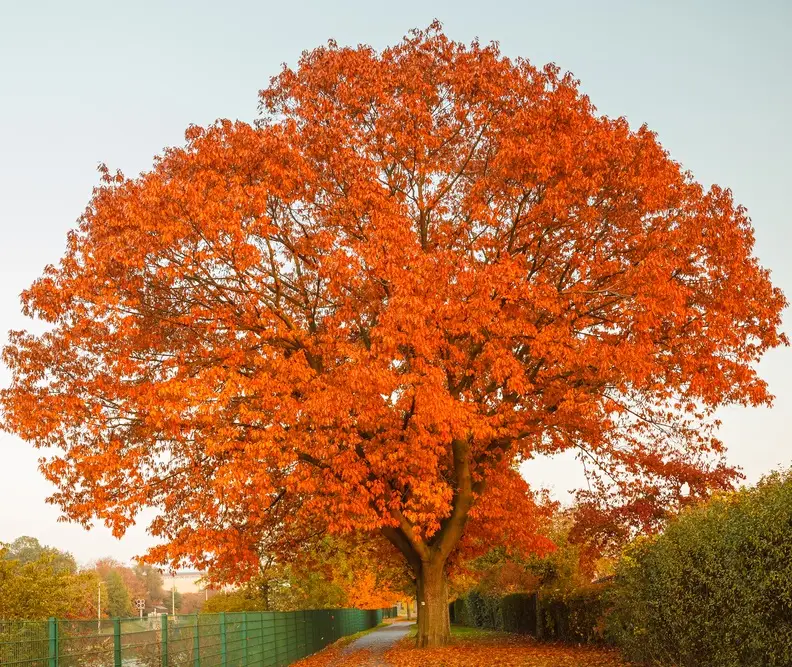
It’s Arbor Day! the one day a year we’re all supposed to feel guilty about not having planted a tree yet. But before you grab just any sapling from the garden center and call it a day, we need to talk about the oak tree. Because planting an oak isn’t just gardening. It’s an act of ecological heroism, basically wearing a cape, except the cape is shade, and it lasts three hundred years.

Here’s the thing most people don’t know: a single oak tree can support over 500 species of caterpillars and other moth and butterfly larvae. Five hundred. That’s not a tree that’s an all-inclusive resort for insects, and every guest is doing important work. Compare that to a Bradford pear (a tragically popular landscaping choice), which supports a whopping zero to five species. Planting a Bradford pear is essentially putting up a “No Vacancy” sign for wildlife, while the oak rolls out the red carpet.

500+
caterpillar species supported by one oak
6,000+
caterpillars needed to raise one clutch of chickadees
300+
years an oak tree can live and give

“But why caterpillars?” you ask, reasonably. Excellent question. It turns out baby songbirds are extremely picky eaters and not in an annoying toddler way, but in a biological survival way. Soft, juicy caterpillars are the perfect baby bird food: high in protein, easy to digest, and conveniently wriggly. Research by entomologist Doug Tallamy found that a pair of Carolina chickadees needs to bring between 6,000 and 9,000 caterpillars to the nest just to raise a single clutch of chicks to fledging. That is an absolutely staggering number of caterpillars – a full-time job, a second job, or even a third job with no benefits.

And here’s where the oak swoops in like a leafy superhero. Without trees like oaks nearby ones that actually host caterpillars parent birds simply cannot find enough food. Neighborhoods full of exotic ornamental plants might look lovely to us, but to a chickadee parent desperately hunting for the 4,372nd caterpillar of the day, they’re basically a desert. Birds in these areas often fail to successfully raise their chicks. The forests go quiet. And nobody wants that.

“The oak is, in many ways, the most generous tree in North America feeding insects that feed birds that fill our mornings with song. It’s a whole ecosystem hiding in plain sight, wearing a disguise of handsome bark and autumn leaves.”

So this Arbor Day, skip the trendy ornamentals. Plant an oak. Yes, it grows slowly, and you might not sit in its full shade for a decade. However, you’ll be planting something that will outlive you, outlive your children, and possibly outlive your grandchildren’s children all while quietly running the most efficient wildlife bed-and-breakfast imaginable. Hundreds of species of caterpillars, thousands of birds fed, and one very satisfied squirrel who will absolutely bury acorns all over your lawn without a thank-you note.

Plant an oak. The birds are counting on you. Literally counting up to 9,000.

#ArborDay #PlantOaks #NativeTreesMatter #ForTheBirds

TOP TIPS for Great Mulch

Double Bark Mulch from JA Rutter Company

What Makes a Great Mulch Job? Depth, Quality, and Doing It Right

A fresh mulch job is one of the simplest ways to transform a landscape but doing it right is what separates a clean, professional look from something that fades fast or causes problems later. Here are some examples of top tips for great mulch.

At JA Rutter, we work with contractors and homeowners every day, and we see firsthand what works and what doesn’t. Let’s break down what actually makes a great mulch job.

The Right Depth Makes All the Difference

One of the most common mistakes in landscaping is improper mulch depth.

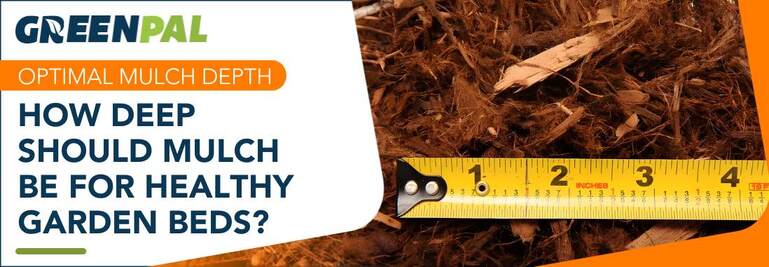
  • Ideal depth: 2–3 inches
  • Too shallow (<1 inch): Won’t block weeds or retain moisture
  • Too deep (4+ inches): Can suffocate roots and trap excess moisture

Mulch should be applied evenly across the bed not piled up against trees or plants (no “mulch volcanoes”). 

What Mulch Actually Does

Mulch isn’t just for looks it plays a critical role in soil health and plant performance.

Here’s what it does:

  • Moisture retention: Keeps water in the soil longer, reducing how often you need to water
  • Weed suppression: Blocks sunlight so weeds struggle to grow
  • Temperature control: Keeps soil cooler in summer and insulated in cooler temps
  • Soil improvement: As mulch breaks down, it adds organic matter back into the soil

Over time, mulch naturally decomposes and becomes part of the soil—this is a good thing. It improves structure, fertility, and overall plant health.

Why Bulk Mulch Beats Bagged Mulch Every Time

Not all mulch is created equal—and this is where quality really matters.

Store-bought bagged colored mulch often:

  • Sits in plastic for long periods
  • Contains inconsistent materials and sizes
  • Is scantily dyed with a lesser grade dye
  • Can dry out or develop odor issues

JA Rutter bulk colored mulch:

  • Is fresher and processed for consistency
  • Uses quality hardwood materials that are tested monthly for over a dozen items like arsenic, lead, mercury, PCBs, etc
  • Has better color retention and breakdown properties
  • Spreads more evenly and performs better over time

If you’re investing time and money into your landscape, the material you use matters. Bulk mulch simply delivers better results and is more cost effective.

Why You Should Skip Landscape Fabric Under Mulch

This is a big one and a common misconception.

Landscape fabric might seem like a good idea for weed control, but in mulch beds, it actually creates problems over time.

Here’s why:

  • Mulch breaks down naturally and turns into soil (compost)
  • That new soil layer builds on top of the fabric
  • Weeds then grow in that layer anyway
  • Roots can get tangled in the fabric, making removal a nightmare
  • Water and nutrients have a harder time reaching the soil below

In short: fabric doesn’t stop weeds long-term it just delays them and makes future maintenance harder.

A properly installed mulch bed at the correct depth will do a better job naturally, without creating headaches later.

The Bottom Line

A great mulch job comes down to a few key principles:

  • Apply 2–3 inches evenly
  • Use high-quality bulk mulch
  • Let mulch break down naturally to improve your soil
  • Skip the landscape fabric it causes more harm than good

At JA Rutter, we make premium hardwood mulch designed to perform whether you’re tackling a backyard refresh or a large commercial install.

Stop in, call ahead, or ask about bulk delivery and get your mulch job done right the first time.