We Test Our Topsoil, Too. Here’s Why It Matters.

a loader maching loading dirt
Quality & Transparency — Part 2

We Test Our Topsoil, Too. Here’s Why It Matters.

In last week’s post we walked through how we test our mulch. Soil gets the same treatment and in Western Pennsylvania’s clay-heavy landscape, the science behind it matters more than most people realize.

Most people don’t think too hard about where their topsoil comes from. But if you’ve ever had plants fail to thrive, seen water pool after a rain, or dug into your bed and hit something closer to concrete than earth the problem often starts underground. That’s the whole reason we have a testing process.

Every new source starts at Penn State

Anytime we bring in raw material from a new site, samples go to Penn State’s Agricultural Analytical Services Laboratory before a single yard goes into production. PSU Extension is the standard for soil analysis in Pennsylvania the same lab that farmers and homeowners across the Commonwealth have relied on for decades.

Why Penn State?

Penn State’s Agricultural Analytical Services Lab measures pH, key macronutrients, organic matter, and soil texture. Their reports include lime and fertilizer recommendations based on what the soil actually needs. Reading a PSU soil test report gives a complete picture of what you’re starting with — and that’s exactly what we need before we touch a batch.

Two tests shape every batch we make

pH Testing

Soil pH determines how well plants can access nutrients and how active soil biology is. We test the pH of every new raw material source so we know what we’re working with and whether we need to adjust our blend to reach the neutral starting point your plants need.

Particle Size Analysis

This tells us the exact breakdown of sand, silt, and clay. Too much clay and the soil compacts, smothers roots, and blocks drainage. Once we have those numbers, we fine-tune how much O38 organic material we add during screening to hit the right balance.

“Anytime we bring in raw material from a new site, that material is tested at PSU so we know exactly what pH we’re starting with.”

Jayme Matkozich, J.A. Rutter Co.

The clay problem that defines Western PA landscaping

If you’ve gardened around Pittsburgh, you already know this. Our soils run heavy. Clay particles pack tightly, leaving little room for air and water movement, blocking root growth, and locking nutrients away from plants. It’s behind most of the drainage problems, compacted beds, and struggling plants our customers come to us about.

20–40% Typical clay content in Western PA native soils
25–35% Our target clay content in finished screened soil

We strive to keep our finished screened topsoil at no more than 25–35% clay lower than what you’ll typically dig up in native Western PA soil. The O38 organic material we blend in during screening improves soil structure and creates the airflow and drainage roots actually need to grow.

We test the finished product for the same two things: pH and particle size, approximately every third batch. Because we use the same raw material for at least a full season, this frequency provides meaningful quality checkpoints without redundancy. It’s consistent with Penn State Extension’s own guidance on how often stable soil profiles need testing.

What good topsoil actually looks like

One misconception we hear constantly: people expect screened topsoil to look like the fluffy potting mix from a big-box store. That expectation leads to real confusion and sometimes real frustration.

The misconception

Good topsoil should look like fluffy bagged potting mix.

The reality

Potting mix is engineered for containers. It’s not built for in-ground beds and landscapes.

The misconception

Finer soil is better soil.

The reality

Overly fine soil compacts around roots, cutting off air and water causing slow growth, root rot, or plant death.

The misconception

Chunky topsoil is low quality.

The reality

Larger particles are essential for airflow, drainage, and root expansion in the ground.

We screen our topsoil through a ¾-inch screen by design. That screen size ensures particles are large enough to keep air pockets open and let water move through. The University of Delaware Cooperative Extension documents exactly what happens without badly formed roots, nutrient deficiencies, and drought stress even in well-watered plants.

Pair our screened topsoil with mushroom compost or more O38 for heavy clay beds, and you’re giving your plants a real foundation, not just the appearance of one.

Ready to start with the right foundation?

Our team is happy to help you figure out exactly what your project needs: soil, mulch, or both.

Talk to our team →

We Test Our Mulch. Here’s Exactly What We’re Looking For.

Quality & Transparency

We Test Our Mulch. Here’s Exactly What We’re Looking For.

There’s real concern online about whether colored wood mulch is safe — and it’s not unfounded. We’ve been making mulch since 1992, and we want to show you exactly what we do to earn your trust.

If you’ve searched “is colored mulch safe” recently, you’ve probably come across some alarming reading. The concern centers on manufacturers who use demolition debris or lumber treated with chemicals like creosote or CCA (chromated copper arsenate) in their mulch. When those chemicals leach into soil, the consequences are real: harm to plants, soil organisms, and the people and pets who spend time in the yard.

The concern is legitimate. UMass Amherst and the Ontario Urban Forest Council have both documented contamination in products from suppliers who don’t scrutinize their wood sources. Although the EPA banned CCA for residential use in 2003, treated wood from old decks, fences, and industrial structures still circulates — and can end up ground into mulch.

The dye itself, by the way, is rarely the issue. Researchers are consistent on this point: it’s the wood source that determines whether colored mulch is safe, not the colorant. Our dyes are water-based and contain no harmful chemicals — but we don’t expect you to take our word for it.

Three layers of protection before mulch reaches your yard

At J.A. Rutter, quality control isn’t a single step at the end of production — it’s built into every stage of the process.

Vendor Agreement

Every supplier who brings wood to our facility must read and sign our Dump Agreement before a single piece of material is accepted. It spells out exactly what we will and will not take for use in our colored wood mulch.

On-Site Load Inspection

Every incoming load is dumped on a dedicated asphalt sorting pad. Our staff scrutinizes each load and rejects anything that doesn’t meet our standards — before it touches production. The same scrutiny applies to material coming in through our pallet wood and green wood recycling programs.

Monthly Independent Lab Testing

Every month, samples of our wood mixture are sent to an independent laboratory and tested against Pennsylvania DEP safety parameters for 17 potential contaminants.

“In all the years of monthly testing, the majority of these substances are non-detectable or present in trace amounts significantly below safely accepted levels.”

— Jayme Matkozich, J.A. Rutter Co.
Monthly Independent Lab Test Panel
pH
Arsenic
Barium
Boron
Cadmium
Chloride
Chromium
Copper
Lead
Mercury
Molybdenum
Nickel
Nitrate Nitrogen
PCBs
Selenium
Sulfate
Zinc

These 17 substances cover everything regulators and researchers have identified as potential concerns in recycled wood products. The Pennsylvania DEP sets the acceptable thresholds; we hold ourselves to those standards every single month, year after year.

The honest answer about colored mulch safety

It depends entirely on the manufacturer. That’s not a hedge — it’s the truth. The concern about contaminated mulch is real, and it exists because not every producer does what we do. Our vendor agreement, sorting pad, and monthly testing program exist precisely because we know what can go wrong when those safeguards aren’t in place.

Pet and People Safe

“My dogs have been munching on mulch in our backyard since we began manufacturing the product back in 1992. If you know what massive animal lovers we are, you know we would never put anything that would harm them in our products.” — Jayme Matkozich

We’ve also been open about products we chose not to make. If you haven’t read why we never made rubber mulch, it’s worth a few minutes — it tells you a lot about how we think about what goes into the landscape.

Prefer to skip colored mulch entirely? We have options.

If you’d rather go fully natural, our mulch line has you covered:

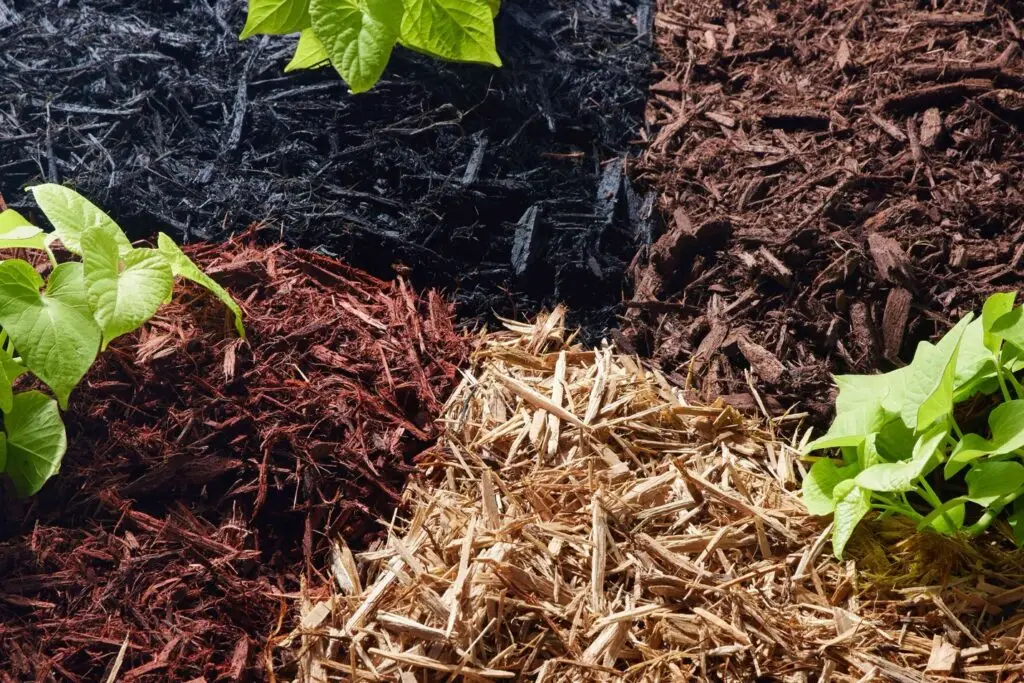
  • Natural Bark Mulch — single or double shred, continuously decomposes to feed your soil.
  • O38 — organic conditioner and stand-alone mulch made from leaves, grass clippings, brush, and stumps. No animal waste, no food waste.
  • Economulch — from our organics line, ground from brush, grass, leaves, and stumps.

Have questions? Browse our FAQ or reach out to our team directly. Everything we make is locally sourced, produced, and processed — and we’re always happy to talk through what’s right for your project.

Does Mulch Attract Bugs?

Does Mulch Attract Bugs? | J.A. Rutter Co.
Landscape Education

Does Mulch Attract Bugs?

What Homeowners and Landscape Professionals Need to Know

Published by J.A. Rutter Co.  |  Monroeville, PA

If you have ever mulched a garden bed and then started to wonder whether you just invited every bug in the neighborhood to move in, you are not alone. It is one of the most common concerns we hear from homeowners and landscape professionals at J.A. Rutter Co. The short answer is this: mulch does interact with insects, but the full picture is far more nuanced than the fear suggests, and knowing the facts will help you mulch smarter.

Here is what the research actually says, and what you should be doing to keep your landscapes healthy and pest-free.

Mulch and Insects: Setting the Record Straight

Yes, organic mulch does attract insects. But here is the critical context: the vast majority of those insects are beneficial. According to Nature’s Way Resources, in organic or living mulches, beneficial insects outnumber harmful pest species by 100 to 1 or more.[1] Organic mulches give beneficial insects, such as predatory ground beetles and hunter spiders, a place to shelter during the day while they patrol your garden for pests at night.

In contrast, inorganic mulches (plastic sheeting, rubber) support a less favorable ratio, sometimes even tipping toward pest species dominance, because they do not support the rich microbial and insect food web that keeps pest populations in check.

The insects that mulch can harbor, including millipedes, sowbugs, centipedes, earwigs, and ground beetles, are largely decomposers and predators. They break down organic material, improve soil structure, and feed on the pests that actually damage plants. Removing them entirely would harm your landscape far more than help it.

The Termite Question: Fact vs. Fear

Termites are the pest that gets the most attention in mulch discussions, and understandably so, given that they cause an estimated $5 billion in property damage nationwide each year. But the relationship between mulch and termites is widely misunderstood.

Iowa State University Extension researchers are clear on this point: there is no evidence that moist mulch conditions attract termite foragers from the surrounding landscape.[2] Termites do not detect your mulch from across the yard and come running. Rather, when termites encounter suitable conditions during their normal foraging, including moisture, cover, and a food source, they are more likely to remain and feed.

The problem is not that mulch summons termites; it is that improperly placed mulch makes it easier for termites already present in your soil to reach your home’s structure.

Iowa State University Extension & University of Maryland Structural IPM Program

Research from the University of Florida/IFAS tested six common mulch types, including cypress, eucalyptus, melaleuca, pine bark, pine straw, and utility mulch, and found that termites fed on all of them to varying degrees. Melaleuca mulch was the most resistant to termite feeding, while utility pruning mulch (mixed species) saw the highest termite consumption.[3]

Separate research from the University of Maryland’s Structural IPM Program, conducted in the field around College Park, studied how shredded hardwood, pine bark nuggets, pea gravel, and shredded eucalyptus bark affected foraging patterns of subterranean termites.[6]

The environmental conditions mulch creates, specifically retained moisture and insulated soil temperatures, matter far more than what the mulch is made of.

University of Maryland Structural IPM Program — Field Research, College Park, MD

University of Florida research also found that termites rarely survive commercial mulch production, because the heat generated during processing is lethal to them.[3]

The risk is not termites traveling in your mulch delivery; it is the conditions mulch creates adjacent to your foundation once it is installed.

University of Florida / IFAS Extension

The Real Problem: Installation Errors, Not Mulch Itself

Across university research and extension guidance from Penn State, Iowa State, and the University of Florida, one theme emerges consistently: insect problems attributed to mulch are almost always the result of how mulch is applied, not the fact that it was applied.

Insect problems attributed to mulch are almost always the result of how mulch is applied, not the fact that it was applied.

Penn State Extension, Iowa State University & University of Florida — Extension Research Consensus

The most common installation mistakes that create pest problems:

  • 1 Applying mulch too deep. Penn State Extension recommends no more than 2 to 3 inches of mulch for landscape beds.[4] Thick, wet mulch heats up as it decomposes, with internal temperatures reaching as high as 140 degrees Fahrenheit, and creates an ideal environment for moisture-loving insects such as carpenter ants and termites. Deep mulch also promotes rot in tree trunks and root zones.
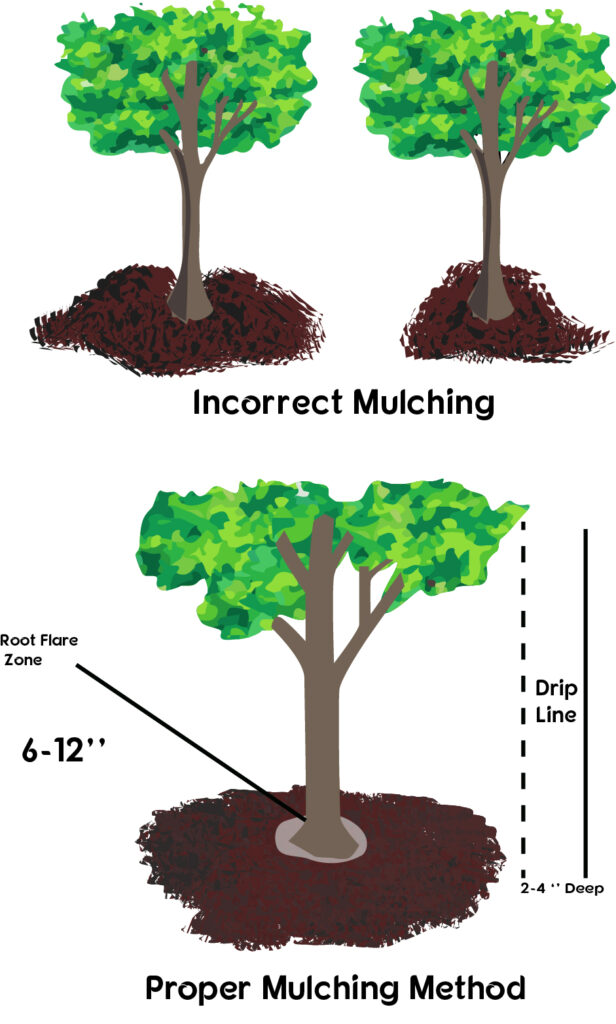
  • 2 Piling mulch against tree trunks — sometimes called “volcano mulching.” According to Penn State Extension, mulch piled against the trunk favors moisture-loving insects that can colonize and expand decayed areas of the wood.[4] Rodents such as voles and mice also tunnel under deep mulch and gnaw on the inner bark, sometimes girdling and killing young trees.
  • 3 Placing mulch directly against the home’s foundation. The University of Florida/IFAS Extension specifies keeping at least a 12-inch zone adjacent to the foundation free of mulch or other ground covers.[3] This creates a dry inspection zone that termites are unlikely to cross and allows visual detection of mud tubes. Building codes in many jurisdictions also require a 6-inch gap between mulch and siding.
  • 4 Adding new mulch on top of old without checking depth. Old mulch compacts over time. Landscape professionals should check depth before each application and remove or redistribute excess before adding a fresh layer. Raking and breaking up matted layers also improves airflow and reduces moisture retention.
  • 5 Using unfinished or partially decomposed compost mulch near foundations. This type of material generates heat and attracts decomposer insects in higher numbers. Well-cured compost mulch is low-risk and provides excellent soil benefits.

Which Mulch Types Are Lower Risk for Pest Problems?

Mulch type matters, especially for applications near structures. Here is how common options compare based on available research:

Hardwood Bark Mulch

J.A. Rutter’s double-shredded hardwood bark is produced from locally sourced hardwoods, decomposes to enrich soil over time, and when properly applied at 2 to 3 inches, supports a healthy beneficial insect community. Keep it away from foundations and avoid burying root flares.

Colored Wood Mulch

J.A. Rutter’s colored mulch, including Cherry Brown, Black, Dark Brown, Red, and Saffron, is manufactured on-site from high-quality recycled materials using non-toxic colorants. Pest interaction depends entirely on application depth and placement, not the color or dye.

Compost & Organic Blends

Well-cured compost mulch carries an extra benefit: high levels of beneficial microbes tend to parasitize termite larvae, making composted mulches less hospitable to termite establishment than raw wood chips.[1] See Rutter’s organic line.

Cedar Mulch

Cedar’s natural oils repel ants, moths, mosquitoes, and carpet beetles.[8] Best reserved for areas where pest control is the priority, such as along foundation perimeters, rather than planting beds where microbial activity matters.

Stone & Gravel

Stone and pea gravel eliminate organic food sources, making them the lowest-risk choice for termite feeding. However, a University of Florida study found favorable moisture conditions persist regardless of mulch type — and stone does not improve soil health.[3]

Mulch Also Protects Against Pests

The insect conversation around mulch tends to focus exclusively on risk, but research shows mulch can actively reduce certain pest problems. A study cited by Nature’s Way Resources found that damage from Colorado potato beetles was 2.5 times higher in un-mulched garden plots compared to mulched ones, because straw mulch supported populations of larval predators that kept pest beetles in check.[1]

Penn State Extension’s Integrated Pest Management (IPM) guidelines note that only 3 to 5 percent of insect species are actually harmful, and that most pests have natural enemies, including birds, toads, and beneficial insects, to keep them in check.[5] A well-mulched landscape that supports these natural predators is a more resilient, lower-maintenance landscape.

Best Practices: How to Mulch Without Creating Pest Problems

Whether you are a homeowner putting down a few yards in your flower beds, or a landscape contractor managing dozens of commercial accounts, these guidelines, drawn from Penn State Extension, the University of Florida/IFAS, Iowa State University, and the University of Maryland, represent the current research consensus:

  1. Apply 2 to 3 inches deep. This is enough to suppress weeds and retain moisture without creating the anaerobic, pest-hospitable conditions that come with deeper applications.[4]
  2. Keep a 12-inch bare zone at the foundation. University of Florida/IFAS Extension is explicit: no mulch, or at most a 1-inch layer, within 12 inches of the foundation. This gap also allows you or a pest control professional to spot mud tubes during routine inspection.[3]
  3. Keep mulch away from tree trunks. Pull mulch 3 to 5 inches from young trees and 8 to 10 inches from mature trees, exposing the root flare. Penn State Extension notes that trees often show rapid improvement in color and vigor once buried root flares are uncovered.[4]
  4. Check depth before every seasonal refresh. Rake and break up old compacted mulch before adding new material. If you are already at 3 inches, you may only need to turn what is there rather than adding a full new layer.
  5. Ensure proper drainage and grading. Iowa State University and the University of Florida both emphasize that moisture management matters as much as mulch type. Grade your landscape to direct water away from the foundation with at least a 5 percent slope for the first 10 feet, ensure gutters discharge at least 6 feet from the foundation, and keep irrigation heads at least 1 foot from exterior walls.[2]
  6. Use well-cured, locally sourced mulch. J.A. Rutter’s products are manufactured on-site in Monroeville, not transported from unknown sources, allowing consistent quality control. Locally processed mulch has gone through the heat cycle of production, significantly reducing the likelihood of viable pest populations in the product itself.

The Bottom Line

Mulch does not cause insect infestations. Improperly applied mulch, whether too deep, too close to structures, or piled against tree trunks, creates conditions that can worsen existing insect problems. Apply mulch correctly, choose a quality product, and you get all the benefits: moisture retention, weed suppression, soil temperature moderation, improved soil health, and a healthier landscape ecosystem.

At J.A. Rutter Co., we have been producing landscape supplies in western Pennsylvania since 1972. Our mulch is locally sourced, manufactured on-site, and sold by weight, so you know exactly what you are getting.

Browse Our Mulch Call (724) 327-1101 Visit Our Yard

Sources & Citations

  1. Nature’s Way Resources. Insects, Pest and Disease Associated With Mulch. natureswayresources.com
  2. Iowa State University Extension and Outreach. Does landscape mulch lead to termites in your home? Yard and Garden. yardandgarden.extension.iastate.edu
  3. University of Florida/IFAS Extension, Pinellas County. Termites and Mulch. blogs.ifas.ufl.edu
  4. Penn State Extension. Mulching Landscape Trees. Vincent Cotrone, David R. Jackson. extension.psu.edu
  5. Penn State Extension. Creating Healthy Landscapes. IPM / Plant Health Care guidelines. extension.psu.edu
  6. University of Maryland Structural IPM Program / Pest Control Technology. Termites & Mulch. pctonline.com
  7. EcoGuard Pest Management. Does Mulch Attract Termites? Complete Guide to Safe Mulching. ecoguardpestmanagement.com
  8. Davey Tree Expert Company. What Mulch is Best for Repelling Bugs? blog.davey.com
  9. Devonian Landscape. Does Mulch Attract Bugs? devonianlandscape.com
  10. NCBI/PMC. Organic Mulch Increases Insect Herbivory by the Flea Beetle Species, Disonycha glabrata, on Amaranthus spp. MDPI/PMC, 2020. ncbi.nlm.nih.gov
  11. J.A. Rutter Co. About Us & Mulch Product Pages. jarutter.com

Mold: What’s This Gross Stuff On My Mulch?

an Image of Artillery fungus growing in chipped mulch

You step outside on a damp morning, coffee in hand, ready to admire your tidy garden beds. And there it is. A neon-yellow blob of something foamy is squatting on your freshly laid mulch. Or maybe it’s a cluster of tiny brown cups with little “eggs” inside, or a patch of white fuzzy threads creeping between the wood chips. Whatever it is, it’s definitely gross, and you want it gone.

Before you reach for the bleach, take a breath. That strange stuff on your mulch is almost certainly harmless, and understanding what it is can save you a lot of unnecessary panic (and unnecessary scrubbing). Here’s your complete guide to the weird world of mulch, mold, and fungi.

Apr–Oct When mulch fungi are most likely to appear, especially after rainy weather Source: University of Massachusetts Amherst Extension
95% Reduction in artillery fungus sporulation when 40% mushroom compost is blended into mulch Source: Penn State Extension / ChromaScape research
18 ft How high artillery fungus can launch its sticky tar-like spore packets toward your siding or car Source: Iowa State University Extension

Why Does Mold Grow on Mulch in the First Place?

Mulch is organic matter (shredded wood, bark, or other plant material), and organic matter decomposes. That’s not a flaw; it’s the entire point. As the Pennsylvania State University Extension explains, “the primary organisms involved with their decomposition are bacteria and fungi, which derive their energy for growth from the carbon-based compounds found in wood and bark. These compounds include cellulose, lignin, and simple sugars.”1

In short, your mulch is a buffet, and fungi are the guests. They’re not invaders; they’re natural components of the mulch ecosystem. The University of Massachusetts Amherst notes that these organisms “are not harmful to landscape plants, and no known health hazards are associated with them unless they are eaten.”2 You can generally expect to see fungal growth from April through October, especially following rainy weather.2

The specific conditions that trigger a visible outbreak are warmth, moisture, and compaction. When mulch is applied too thickly, the bottom layers stay permanently moist and poorly aerated, creating a perfect incubator for fungal growth.3

The Usual Suspects: A Field Guide to Mulch Mold

1. Slime Mold (“Dog Vomit Fungus”)

What it looks like: A bright yellow, orange, or white foamy mass, sometimes several inches to over a foot across, with a texture that has been memorably compared to dog vomit. It seems to appear overnight.

What it actually is: Despite the name, slime mold isn’t really a fungus at all. According to Rutgers Cooperative Extension, slime molds (genus Physarum) “are, in fact, not a fungus, but are soil-dwelling amoeba, a single-celled organism that contains multiple nuclei when they clump together to form a single mass.”4 The Iowa State University Extension describes them as “primitive fungal-like organisms” that feed on bacteria and other microorganisms living in the mulch.5

Is it dangerous? No. Slime molds do not harm landscape plants. Left alone, they dry up within a few days and turn into a white, powdery mass.2 If you find it offensive (and who could blame you?), simply scoop it up and discard it in your household trash or compost pile.

Fun fact: The Ohio State University Extension notes that if a slime mold persists on plant foliage for a long time, it could potentially inhibit photosynthesis, though this is unusual. In the mulch itself, it’s purely cosmetic.6

2. Mushrooms

What they look like: Classic toadstool shapes in various colors and sizes, from less than an inch to several inches tall. Some disappear within a day or two; others can persist for a full growing season.

What they actually are: The fruiting bodies of fungi that have colonized your mulch’s wood and bark material. Penn State Extension notes that “many different fungi produce mushrooms,” and they come in a wide variety of colors, shapes, and sizes.1

Are they dangerous? The fungi themselves are not harmful to your plants. However, some mushroom species are toxic to people and pets if eaten. Never eat a mushroom growing in your landscape unless you are an experienced mycologist who can positively identify the species.

What to do: You can knock them over, pull them up, or just let them decompose on their own. Once the food source below is consumed, they’ll stop appearing.3

3. Bird’s Nest Fungus

What it looks like: Tiny cups (usually brown, gray, or white) about one-quarter inch in diameter, each containing small round “eggs.” They grow in clusters and really do look like miniature bird’s nests, which makes them one of the more charming fungal inhabitants of your garden.

What they actually are: A true fungus (genera Crucibulum and Cyathus). The “eggs” are structures called peridioles, which are spore-containing masses. According to the University of Delaware Cooperative Extension, “spore bodies (eggs) are splashed out of cups during rains, or moved around by animals or man, spreading spores of the fungus.”7

Are they dangerous? Generally no. Penn State Extension notes they “may grow in large areas of mulch, but they are not a problem.”1 The spores can occasionally stick to surfaces, but unlike artillery fungus (see below), they’re easily removed and don’t leave a stain.

4. Stinkhorn Fungus

What it looks like: A slimy, foul-smelling stalk topped with a dark, gooey cap. Stinkhorns start as an egg-like structure in the soil and emerge during cool, wet conditions in late summer and fall. Multiple species exist; some have an unmistakably phallic shape.

What they actually are: Fungi in the genus Mutinus and related genera. The Iowa State University Extension explains that stinkhorns are “aptly named as they are horn-shaped and foul-smelling.”5 The odor is intentional, as it attracts flies that carry the spores away on their bodies.

Are they dangerous? No. Rutgers Extension notes that “despite the odor and sometimes distinctive coloration, these fungi are not considered toxic to plants or poisonous to people.”4 They’ll shrink and dry out on their own within a few days after the weather dries.

5. White Mycelium

What it looks like: A cotton-like white film or network of threads running through and across the surface of your mulch. It may look alarming, but it’s actually just the vegetative body of a fungus: the underground “root system” made visible.

What it actually is: Mycelium is the main body of a fungus, and all the other fungi listed here have it. When you see white mycelium at the surface, it’s a sign of active decomposition. It typically disappears on its own as the mulch dries out.11

Is it dangerous? No. Raking the mulch and exposing the threads to sunlight will usually dissolve them.3

The One You Actually Need to Worry About: Artillery Fungus

Most mulch fungi are harmless curiosities. Artillery fungus (Sphaerobolus spp.) is the exception, and it deserves its own section.

What it looks like: Tiny cream-colored or orange-brown cups, roughly 1/10 of an inch in diameter, each containing a dark round spore mass. Areas of mulch with artillery fungi may appear matted and lighter in color than the surrounding mulch.1

What it actually is: A wood-decay fungus. Its genus name, Sphaerobolus, literally translates from Greek as “sphere thrower,” because that’s exactly what it does.10 The University of Delaware explains the mechanism: “Accumulation of water and nutrients in the fruiting body eventually leads to a pressure release of the spore which is shot toward any light source up to a distance of several feet.”7

Those tiny spore packets (sticky, black, and tar-like) orient themselves toward light, which means they head straight for your light-colored house siding, your car, your fence, or anything pale and reflective nearby. The spores can be propelled as high as the second story of a house.1 Iowa State University notes they “can be launched up to 18 feet into the air.”2

Are they dangerous? Not to people or plants. To your property, however, the answer is yes. Once the spore mass hardens on a surface (which happens quickly), it becomes extremely difficult to remove without damaging the surface beneath. Penn State Extension describes the spots as resembling “a small speck of tar.” Fresh spots within 24 to 48 hours can sometimes be removed with vegetable oil, but hardened spots often require professional cleaning and may leave a permanent stain.3

What to do:

  • Rake mulch regularly to disturb fungal growth and help the surface dry out.
  • Replace hardwood mulch near your home’s foundation with large pine bark nuggets or natural bark mulch, which are less hospitable to Sphaerobolus.8
  • Penn State research found that blending at least 40% mushroom compost (the byproduct of edible mushroom production) into landscape mulch can suppress artillery fungus sporulation by up to 95%, and it also boosts plant growth.9

How to Reduce Mold in Your Mulch (Without Giving Up Mulch Entirely)

You don’t have to swear off mulch. You just need to be smarter about it. Here are evidence-backed strategies for keeping fungal growth to a minimum.

  • Depth matters Keep mulch at 2 to 3 inches deep. At 4 inches or deeper, the bottom layer stays permanently moist and low in oxygen, creating ideal conditions for fungal mats, slime mold, and water mold.3 Penn State recommends never exceeding 2 to 3 inches, both for mold prevention and for healthy root growth.1
  • Rake regularly Turning the mulch improves airflow, exposes fungal growth to sunlight, and helps the surface dry out. This is one of the simplest and most effective preventive measures.14
  • Choose your mulch wisely Cedar and cypress mulches contain natural oils that resist fungal growth.11 Large pine bark nuggets are also more resistant than shredded hardwood because their larger size allows rain to drain through rather than being absorbed.16 Penn State tested 27 different mulch types and found that large pine bark nuggets were among the most resistant to artillery fungus.8 Browse J.A. Rutter’s mulch options to find the right fit for your beds.
  • Water less frequently If you water your plants every day, your mulch stays perpetually damp, which is the perfect environment for mold. Try watering once or twice per week to allow drying between waterings.14
  • Keep mulch away from plant bases and building foundations Piling mulch against tree trunks, plant stems, or house siding creates moisture traps that invite rot, disease, and (in the case of artillery fungus) the perfect launching pad for sticky spores. Keep mulch pulled back 2 to 3 inches from any plant base, and consider using non-organic ground cover within 10 to 20 feet of your home’s exterior.12
  • Mix in compost Research from Penn State Extension found that replacing or mixing at least one-third of wood chip mulch with well-finished mushroom compost significantly reduces artillery fungus populations, because the compost introduces competing microorganisms that crowd out Sphaerobolus.3 This strategy works for other nuisance fungi as well.

The Bottom Line

That gross stuff on your mulch is, in almost every case, a sign that your mulch is doing exactly what it’s supposed to do: decomposing, cycling nutrients, and supporting a complex microbial ecosystem. Slime mold, bird’s nest fungus, stinkhorns, mushrooms, and white mycelium are all natural, harmless parts of the decomposition process.

The one genuine problem child is artillery fungus, which is worth taking seriously if you have light-colored siding or a car parked nearby. Switch to pine bark nuggets or cedar mulch in those areas, mix in mushroom compost, keep the depth at 2 to 3 inches, and rake it regularly.

Your mulch bed isn’t broken. It’s alive. And that’s a good thing.

References

  1. Penn State Extension. What Is Growing in My Landscape Mulch? Mushrooms, Slime Molds, and Fungus.
  2. University of Massachusetts Amherst. Fungi in Mulches and Composts.
  3. GetHandyOutdoors.com. Mulch Mold & Fungus: How to Treat It and Stop It Coming Back.
  4. Rutgers Cooperative Extension. Control of Nuisance Fungi in Landscape Mulch.
  5. Iowa State University Extension. Managing Strange-Looking Fungi in Landscape Mulch.
  6. Ohio State University Extension (as cited in AskMaryStone.com).
  7. University of Delaware Cooperative Extension. Artillery Fungus and Other Things That Grow in Mulch.
  8. AskMaryStone.com. Slime Mold & Artillery Fungus.
  9. ChromaScape/Amerimulch. How to Protect Your Mulch Supply from Artillery Fungus.
  10. ChromaScape/Amerimulch. Artillery Fungus: Species Overview.
  11. Devonian Landscape. How to Prevent Mold in Mulch.
  12. SS Landscape Supply. Mulch Types Compared.
  13. Topsoil.com. Pine Mulch vs Cedar Mulch.
  14. Cal Blend Soils. How to Deal with Mulch Fungus.
  15. Ask Extension / Oregon State University. Mulch Without Artillery Fungus?
  16. Ask Extension. Cited source on bark nugget drainage and fungal resistance. ask.extension.org

TOP TIPS for Great Mulch

Double Bark Mulch from JA Rutter Company

What Makes a Great Mulch Job? Depth, Quality, and Doing It Right

A fresh mulch job is one of the simplest ways to transform a landscape but doing it right is what separates a clean, professional look from something that fades fast or causes problems later. Here are some examples of top tips for great mulch.

At JA Rutter, we work with contractors and homeowners every day, and we see firsthand what works and what doesn’t. Let’s break down what actually makes a great mulch job.

The Right Depth Makes All the Difference

One of the most common mistakes in landscaping is improper mulch depth.

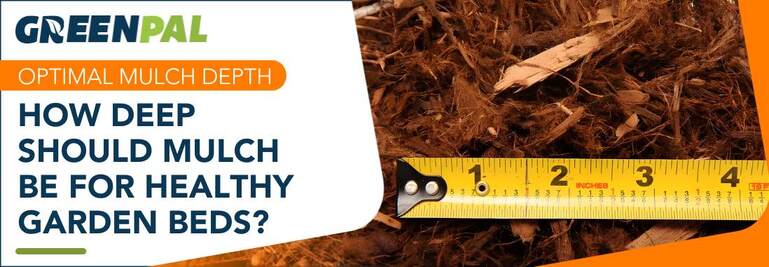
  • Ideal depth: 2–3 inches
  • Too shallow (<1 inch): Won’t block weeds or retain moisture
  • Too deep (4+ inches): Can suffocate roots and trap excess moisture

Mulch should be applied evenly across the bed not piled up against trees or plants (no “mulch volcanoes”). 

What Mulch Actually Does

Mulch isn’t just for looks it plays a critical role in soil health and plant performance.

Here’s what it does:

  • Moisture retention: Keeps water in the soil longer, reducing how often you need to water
  • Weed suppression: Blocks sunlight so weeds struggle to grow
  • Temperature control: Keeps soil cooler in summer and insulated in cooler temps
  • Soil improvement: As mulch breaks down, it adds organic matter back into the soil

Over time, mulch naturally decomposes and becomes part of the soil—this is a good thing. It improves structure, fertility, and overall plant health.

Why Bulk Mulch Beats Bagged Mulch Every Time

Not all mulch is created equal—and this is where quality really matters.

Store-bought bagged colored mulch often:

  • Sits in plastic for long periods
  • Contains inconsistent materials and sizes
  • Is scantily dyed with a lesser grade dye
  • Can dry out or develop odor issues

JA Rutter bulk colored mulch:

  • Is fresher and processed for consistency
  • Uses quality hardwood materials that are tested monthly for over a dozen items like arsenic, lead, mercury, PCBs, etc
  • Has better color retention and breakdown properties
  • Spreads more evenly and performs better over time

If you’re investing time and money into your landscape, the material you use matters. Bulk mulch simply delivers better results and is more cost effective.

Why You Should Skip Landscape Fabric Under Mulch

This is a big one and a common misconception.

Landscape fabric might seem like a good idea for weed control, but in mulch beds, it actually creates problems over time.

Here’s why:

  • Mulch breaks down naturally and turns into soil (compost)
  • That new soil layer builds on top of the fabric
  • Weeds then grow in that layer anyway
  • Roots can get tangled in the fabric, making removal a nightmare
  • Water and nutrients have a harder time reaching the soil below

In short: fabric doesn’t stop weeds long-term it just delays them and makes future maintenance harder.

A properly installed mulch bed at the correct depth will do a better job naturally, without creating headaches later.

The Bottom Line

A great mulch job comes down to a few key principles:

  • Apply 2–3 inches evenly
  • Use high-quality bulk mulch
  • Let mulch break down naturally to improve your soil
  • Skip the landscape fabric it causes more harm than good

At JA Rutter, we make premium hardwood mulch designed to perform whether you’re tackling a backyard refresh or a large commercial install.

Stop in, call ahead, or ask about bulk delivery and get your mulch job done right the first time.

Put Down the Rake This Spring

Spring Cleanup in Western PA: A Smarter (and Lazier) Approach

Why waiting a few extra weeks can fill your yard with fireflies, native bees, and butterflies — and give you a great excuse to relax a little longer.

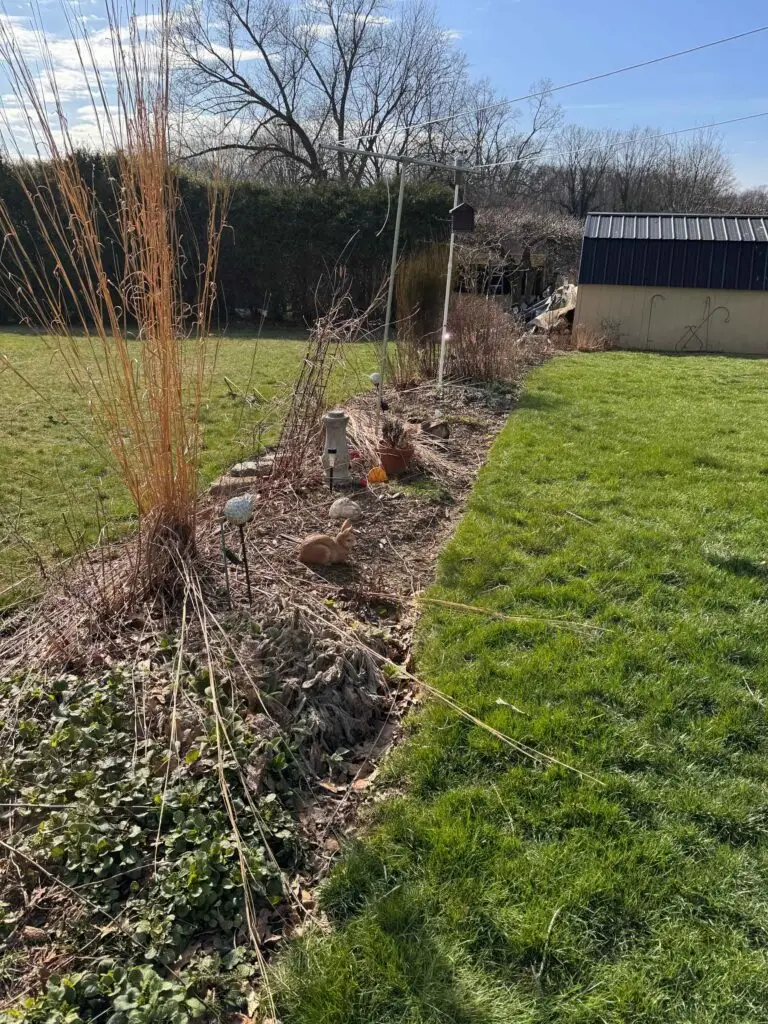
Every March, the urge hits like a Pittsburgh pothole. The snow melts, one suspiciously warm afternoon shows up, and suddenly you’re outside in your mud boots eyeing all those dead stems and matted leaves like they personally offended you.

Rake in hand, ambition high, you’re ready to clean everything up.

Here’s the plot twist: your yard isn’t as dormant as it looks.

Tucked inside hollow stems, buried under leaf litter, and nestled just below the soil surface, hundreds of beneficial insects are still waiting out winter. These include pollinators, pest controllers, and the fireflies you’ll enjoy on summer evenings.

A too-early spring cleanup can wipe them out before they ever emerge.

The good news? A better approach is actually easier — and a little lazier.


Why You Should Delay Spring Yard Cleanup

Western Pennsylvania yards are full of life, even in early spring. Cleaning too early disrupts important insect life cycles and reduces pollinators later in the season.

Waiting just a few extra weeks helps support:

  • Pollinators like native bees
  • Natural pest control insects
  • Fireflies and butterflies

Beneficial Insects Hiding in Your Yard

Native Bees in Pennsylvania

Unlike honeybees, most of Pennsylvania’s 400+ native bee species are solitary. Many overwinter in leaf litter or just below the soil surface.

Bumblebee queens, for example, emerge in early spring and need time to warm up before starting a colony. Disturbing their habitat too early can be harmful.


Firefly Larvae in Western PA

Fireflies spend the winter as larvae in soil and leaf litter — exactly where spring cleanup usually happens.

If disturbed too soon, they may never emerge to light up your yard in June.


Early Spring Butterflie

Species like the eastern comma and mourning cloak overwinter as adults in:

  • Bark crevices
  • Log piles
  • Leaf litter

They are often the first butterflies seen in Western PA and rely on this shelter to survive.


The One Rule for Spring Cleanup Timing

Wait until nighttime temperatures are consistently above 50°F before cutting back plants or removing leaf litter.

In Western Pennsylvania, this usually means:

  • Late April to early May (not March)

This temperature signals that most insects have emerged and can relocate safely.

Cleaning earlier risks destroying cocoons and overwintering habitats.


Wildlife-Friendly Spring Cleanup Tips

Leave Plant Stems Standing

Many native plants like:

  • Goldenrod
  • Joe-Pye weed
  • Coneflower

…host bee larvae inside their stems.

When you cut them:

  • Trim to 12–18 inches
  • Leave clippings on the ground for a few weeks

Use Leaf Litter as Natural Mulch

Leaf litter is not yard waste — it’s essential habitat.

Benefits include:

  • Insulating plant roots
  • Feeding soil organisms
  • Protecting insects like beetles and bees

Rake lawns if needed, but leave garden beds alone.


Create a Backyard Brush Pile

A simple pile of sticks and stems provides habitat for:

  • Butterflies
  • Toads
  • Beneficial insects

Call it a “wildlife brush pile” if you want it to sound intentional.


Clean Up in Sections

Instead of clearing everything at once:

  • Work in stages over several weeks
  • Leave undisturbed areas as safe zones

This gives insects time to move naturally.


What You Can Do Early in Spring

You don’t have to wait on everything. These tasks are safe to start early:

  • Pruning shrubs and trees (roses, fruit trees, butterfly bush)
  • Removing invasive plants like garlic mustard
  • Edging garden beds
  • Repairing fences and hardscaping
  • Preparing vegetable beds that were already clear

A Better Approach to Spring Yard Care

You don’t need to abandon a tidy yard — just adjust your timing.

By waiting a few weeks and leaving natural materials in place, you’ll support:

  • Healthier pollinator populations
  • More fireflies in summer
  • A stronger, more balanced ecosystem

And honestly, after a Western PA winter, everything — including you — deserves a little extra time.


Final Thought: Let Nature Do the Work

A small delay in spring cleanup leads to a big payoff all season long.

More bees, More butterflies, More fireflies.

Less work for you.

Not a bad trade.

JA Rutter’s Rain Garden: Part 3, Plant Choices

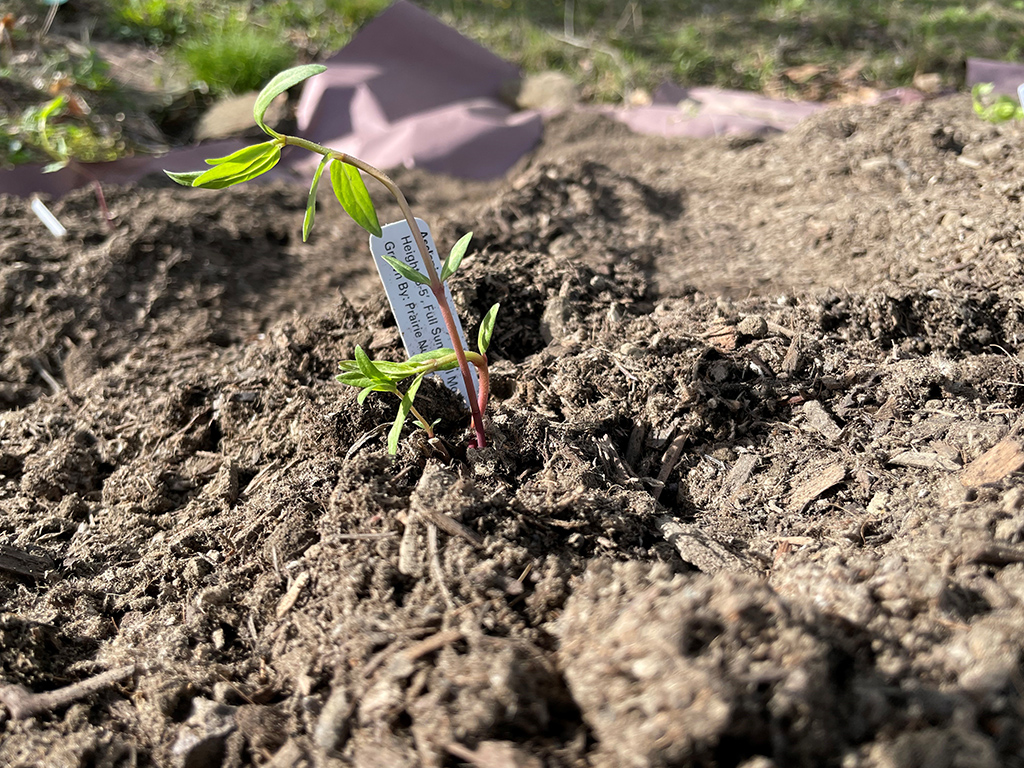
Sweet Joey PyeWeed at JA Rutter Pollinator Garden

We’re in the home stretch of the development of our native plant pollinator rain garden. In the third installment of our series, Jayme will discuss the plants she chose and why she chose them. 

In order to set my garden up for success, I try to be thoughtful about the plants I choose. I try to pick the right plant for the right place. In this case, it’s an area that gets mostly sun and there’s lots of moisture in the area. We need to use plants that thrive in those conditions. In addition, we have tons of deer pressure on the property so we need to choose plants that are known to be deer resistant then hope that the deer read the manual!

I mentioned above the concept of “right plant, right place”. This fundamental concept is choosing plant species that are adapted to the location and situation in which they are placed. Plants that are well suited to their site will establish quickly, will have a healthy root system and be healthier plants. For lazy gardeners like me, they will perform well with limited additional input and work. Here are some questions to ask yourself as you’re deciding on plants:

  1. What is the climate in the area? Is it hot or cold, humid or dry? Plants need to be able to tolerate the local climate.
  2. What is the soil type? Is it sandy, loamy, or clayey? Different plants thrive in different soil types.
  3. How much sun does the area get? Is it full sun, partial sun, or full shade? Plants need varying amounts of sunlight to grow properly.
  4. What is the moisture level in the area? Is it wet, moist, or dry? Different plants have different moisture requirements.
  5. What is the size of the area? Is it a small space or a large landscape? Plants should be chosen based on the available space.
  6. What is the purpose of the plant? Is it for aesthetics, privacy, or food production? Different plants serve different purposes.
  7. What is the growth rate of the plant? Does it grow slowly or quickly? This is important to consider when planning for long-term growth and maintenance.
  8. What is the maintenance level required? Will the plant require regular pruning, fertilizing, or watering? It is important to choose plants that fit within the available time and resources for maintenance.

By asking these questions, you can select plants that are best suited for the specific conditions of your garden or landscape, and ensure they will thrive and provide the desired benefits.

I purchased these plants at an online native resource called Prairie Nursery (www.prairienursery.com). They arrived in great condition and were carefully packed. I will create a post in the future that lists other sources for native plants. 

Buttonbush (Cephalanthus occidentalis) https://www.prairienursery.com/buttonbush-cephalanthus-occidentalis.html

I’ve admired this unique plant for a while and am so excited to find the right spot for it. I will admit, I tried the dwarf variety in another garden last year and it did not fare well because I didn’t follow my own advice about right plant, right place. The area just didn’t get enough moisture and I tried planting it in July, when moisture levels are at their lowest. Live & learn!

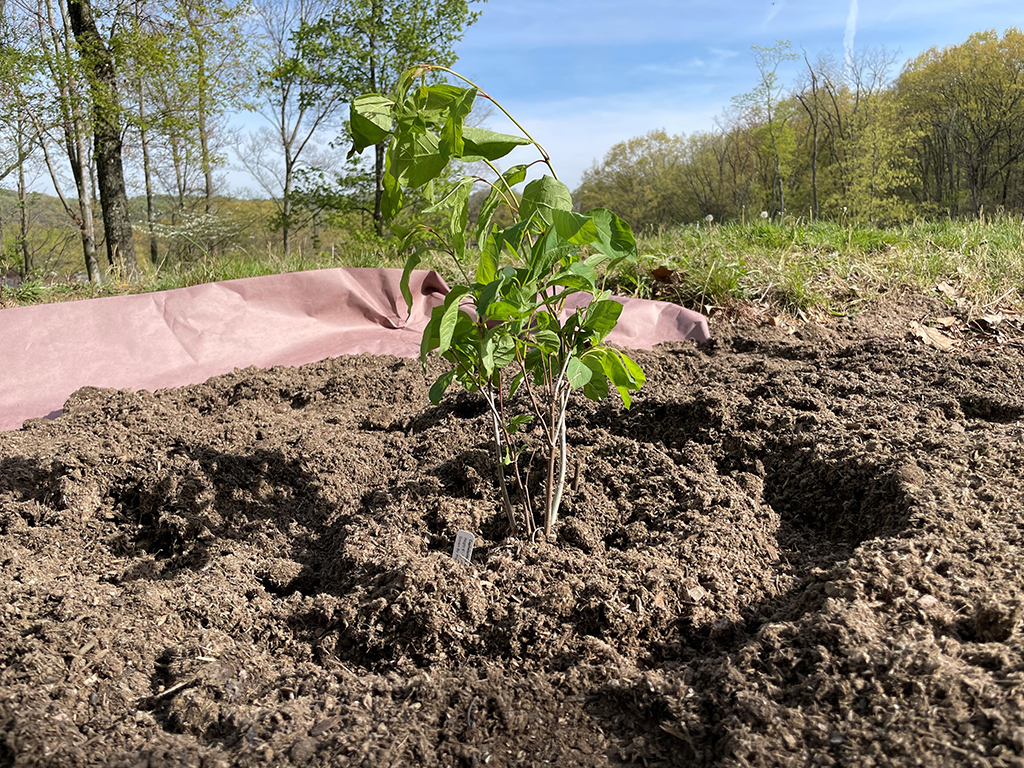
Newly Planted Buttonbush

Buttonbush is a native shrub with golf ball sized flower clusters that resemble pin cushions. The fragrant, nectar-loaded clusters are attractive to pollinators like bees, flies, moths, butterflies and even hummingbirds. Waterfowl eat the seeds and Wood ducks like to use the plant structure for protection of brooding nests. We get lots of Mallards on site and the occasional Wood duck so fingers crossed they like it! Buttonbush is adaptable to a wide range of soils but it is not suitable for dry sites. 

When planting for pollinators, not only is it important to provide nectar sources, but it is also important to provide host plants. Buttonbush is a host plant for several silkmoths, the Beautiful Wood-Nymph, and other Lepidoptera.

This shrub can grow up to 6-15 feet tall with a spread of 4-8 feet so be sure to place it in a spot where it has room to grow.

Sweet Joe Pye Weed (Eupatorium purpureum) https://www.prairienursery.com/sweet-joe-pye-weed-eupatorium-purpureum.html

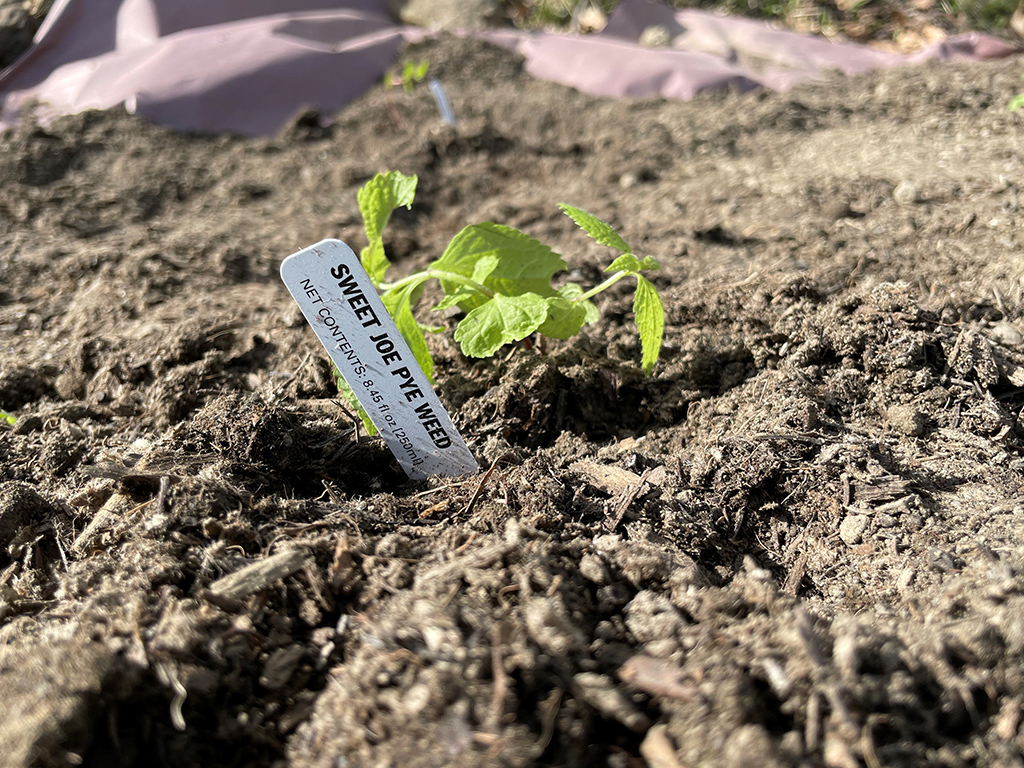
Sweet Joe thrives in semi-shade as well as in full sun. It grows 3-6 feet tall and has beautiful pinkish-purple vanilla-scented blooms that attract a wide variety of pollinators like skippers, Swallowtails and Monarchs. It will also attract friends like bumblebees and bee flies. Besides pollinators, you may find tree hoppers, leaf beetles and gnats which are food sources for other insects and birds. Some smaller birds also eat the seeds of Joe Pye Weed. Insects may overwinter in the stalks of this plant so it’s a great excuse to minimize your fall cleanup work! This hardy perennial can tolerate constantly moist soil with occasional flooding so I feel confident it will love the spot I chose. 

Sweet Joe Pye Weed

Swamp Milkweed or Red Milkweed (Asclepias incarnata) https://www.prairienursery.com/red-milkweed-asclepias-incarnata.html

This is another exceptional plant for pollinators and is easily grown in moist to wet soil, even thriving in average soil to mucky clay soil. Hawk moths, Swallowtails, Fritillaries, Monarchs, skippers, bumble bees and even hummingbirds will spend time visiting the fragrant blooms. It is also a host plant for the Monarch butterfly, Queen butterfly, Dogbane Tiger moth and the Milkweed Tussock moth. This plant is similar in height to Sweet Joe Pye Weed so I think they’ll complement each other well. 

Swamp Milk Weed

While these 3 foundation plants get established, I will supplement the empty space in between with annual zinnias. They are native to North America, easy to grow from seed, are favorites of pollinators, bloom all summer long and are just plain beautiful with their wide variety of bright colors. They also make a great cut flower if you enjoy fresh flowers in the house like I do!

Ja Rutter’s Rain Garden: Time for Soil!

Time to mix the soil for the Pollinator Rain Garden at JA Rutter

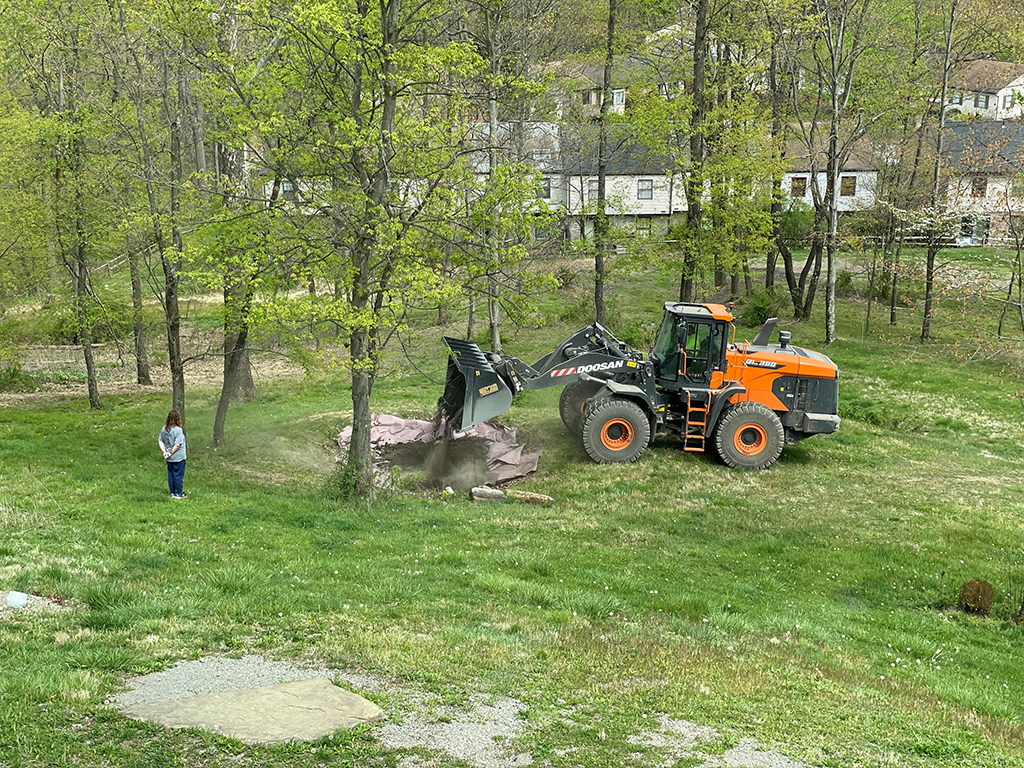
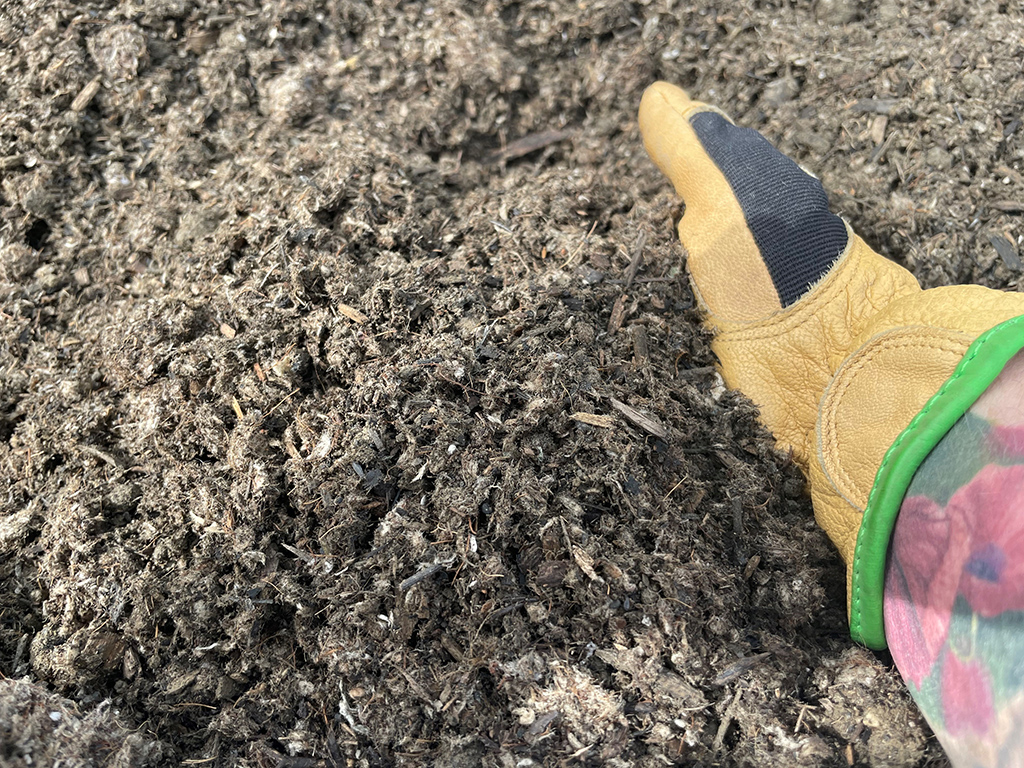
This afternoon, Jayme had the production team mix up a special soil mix for the native pollinator rain garden. The mix contains 1 cubic yard of our standard screened topsoil which is screened through a ¾” screen. Our standard topsoil is already amended with our O38 organic soil amendment but Jayme wanted even more so she asked them to add a full cubic yard of the O38 to the mix. Finally, they added 75 cubic feet of PittMoss

A front loader at JA Rutter Filling in the Pollinator Garden

Why is our O38 so great as a soil amendment?

  • Contains lots of organic matter, which our typical clay-cased PA soils are lacking
    • The organic matter is a food source for beneficial microorganisms that live in the soil.
  • Assists with water retention
  • Improves nutrient exchange between the soil and the plant

Soil conditioners are soil amendments that improve the soil structure by increasing aeration, water holding capacity, and nutrients. They loosen up compacted, hard pan and clay soils and release locked up nutrients. Soil conditioners can also raise or lower pH levels depending on what they are made of.

Organic matter causes soil to clump and form soil aggregates, which improves soil structure. With better soil structure, permeability (infiltration of water through the soil) improves, in turn improving the soil’s ability to take up and hold water.

038/PittMoss mixture

Why is PittMoss a great component to this mix?

  • PittMoss is made from organic, recycled paper that is locally sourced. This paper is engineered to provide the perfect environment for root development. 
  • PittMoss has the best possible balance of aeration and water absorption with a vast carbon source for mycorrhizae. 
  • The air space created, water retention and available carbon makes for exceptional root development and the best environment for those roots to obtain water and nutrients while the microbes thrive to further support the plants. 
  • PittMoss grows healthier plants & reduces root shock of transplanted plants. 
  • The high porosity of PittMoss saves water and improves drainage. The cellulosic fibers of PittMoss allow for applied water to be evenly distributed throughout the media. 
  • PittMoss requires 2/3 less water than peat-based blends. 
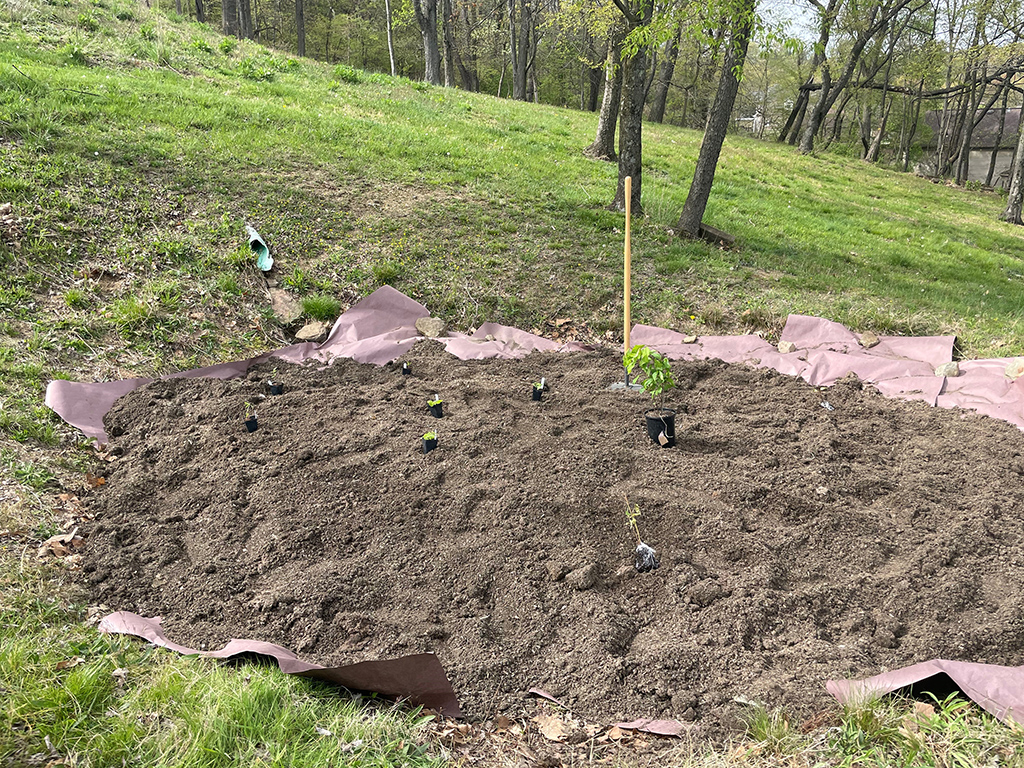
Plant layout